Sunday, June 26, 2011

Grilled Shrimp and Sausage Skewers with Smoky Paprika Glaze

I was desperate to use my grill by the end of last week, after numerous rainy days, and more in sight for the evening.  After checking the weather channel, and seeing that the rain was supposed to start around 7pm, I had just enough time to make my shrimp and sausage skewers before impending doom- that is, if the meteorologists were correct with their timing.  Seeing as it was 5:45, my bamboo skewers had to soak for an hour, and the kebabs had to cook for 6-8 minutes, it was a race against time.   Thankfully, luck was on my side on Friday night, as I finished up just as I felt the first raindrops start to fall.

Deciding to chance it was the best decision I could have made though.  These skewers were so good that I would gladly had stood out in the pouring rain, sheltering them from the precipitation, if needed.  What's great about these particular skewers is that all you have to really worry about it cooking the shrimp, as the sausage used is precooked, which takes out the threat of overcooked meat from the equation- an ailment that plagues many kebabs.  The glaze was an added bonus in these skewers.  Have you ever had smoked paprika?  It is a far cry from the generic paprika which is a great coloring agent, but doesn't add too much flavor.  One whiff of smoked paprika and you know you're in a whole other flavorful territory.


Grilled Shrimp and Sausage Skewers with Smoky Paprika Glaze


Ingredients:
3/4 cup olive oil
4 large garlic cloves, pressed
2 tbsp chopped fresh thyme (or 2 tsp dried thyme)
5 tsp smoked paprika
4 tsp Sherry wine vinegar
3/4 tsp salt
1/2 tsp freshly ground black pepper
1/2 tsp dried crushed red pepper
12-20 extra-large shrimp 
12-16 1-inch-long pieces andouille sausage (about 16 ounces) (or other fully cooked smoked sausage, such as linguica)
2 bell peppers (red, orange, or yellow), cut into 1- 1 1/2 inch pieces
1 vidalia onion cut into 1 - 1 1/2 inch pieces, each piece should be 2 layers

6-8 metal or bamboo skewers (** If using bamboo skewers, make sure to soak them at least 1 hour)

Directions:
1. In a medium bowl, whisk together oil, garlic, thyme, smoked paprika, vinegar, salt, pepper, and crushed red pepper.  Transfer half of the mixture to a small bowl for serving, and reserve the other half to use while cooking.
2. Make your skewers by alternately threading on shrimp, sausage, peppers, and onions.  Depending on how many pieces of shrimp and sausage you have, and how many skewers, each will have about 2 pieces of each shrimp, sausage, peppers, and onions.  A couple of mine had three shrimp each.  Arrange the skewers on a large rimmed baking sheet.  
3. Prepare grill to medium-high heat.  Coat the grates with oil (I used canola).  Brush both sides of the skewers with the glaze, and place on the grill.  Grill about 6-8 minutes, until the shrimp are opaque, turning and brushing with glaze occasionally.
4. Serve the skewers with the reserved glaze.


Notes:
  • The original recipe in Bon Appetit uses cherry tomatoes and red onion in place of the peppers and vidalia onion.  My tomatoes and red onion had unexpectedly gone bad, so I substituted the other veggies, so feel free to use whatever you want.  They will still be crunchy, with the edges being slightly more cooked.  Alternately, you don't even have to put the veggies on if you don't want... I was just pretending to be healthy.
  • In the original recipe, the shrimp that it calls for are the extra-large shrimp, sometimes called colossal, which have 13-15 per pound, and the recipe called for 12 which would be just under a pound.  I couldn't find these at the market, but they did have the jumbo shrimp which were 16-20 per pound.  I ended up with 20 slightly smaller shrimp, and this is why I ended up doing more skewers, with some having more shrimp per skewer.  Feel free to use either- the U 13-15 are hard to find in my experience.
  • I realized as I was making this that I didn't have fresh thyme, so I substituted the dry.  A general rule of thumb is that 1 tbsp of fresh herbs, equals 1 tsp of dry herbs.
  • I used Pimenton de la Vera for my paprika, which is a hot smoked paprika.  You can also used sweet smoked paprika if you want.  It's sometimes labeled "Pimenton Dulce" or "Pimenton de la Vera Dulce".  Don't use the normal paprika you may have in your spice cabinet- the smoked paprika makes a huge difference!

Friday, June 24, 2011

I Scream, You Scream

Between June 30th and July 2nd I will be the proud owner of a brand spanking new Cuisinart ICE-21 Frozen Yogurt, Ice Cream and Sorbet Maker, in Turquoise!


Anyone else as excited as I am about this amazing development?  Probably not.

.... and I needed to get a cookbook to go with this, right?  I will also be receiving The Perfect Scoop by David Lebovitz, so I will be all prepared to make some amazing ice cream.

Wednesday, June 22, 2011

Thai Chicken and Basil Stir-Fry

My garden has been really starting to pick up lately (*knock on wood*), overflowing (kinda) with parsley, cilantro, lettuce, and of course basil, which means that it's about high time that I start using some of my homegrown herbs/lettuce/(and maybe someday peppers).


After thinking about all the awesome stuff I want to do with basil- pesto, caprese salad, strawberry-basil ice cream, tomato-basil soup, et cetera, et cetera, I decided that to start out, a Thai-inspired chicken and basil stir-fry would be the way to go.  I've made a terrific riff on chicken-basil stir-fry before that uses shitake mushrooms (that I'll make sometime soon), but I wanted to try something a little different, and so I came across a few recipes through Tastespotting that sounded promising. They are actually very similar to the one that I've made in the past.  I love the both simplicity and complexity of this stir-fry.  On one hand you have only two main ingredients- chicken and basil- very simple, but then you have the flavorings which give your taste buds a workout- sweet and spicy at the same time.  It's really awesome!


Thai Chicken and Basil Stir-Fry
Source: Gimme Some Oven, originally adapted from Rasa Malaysia and No Recipes

Ingredients:
2 Tbsp vegetable oil
4 garlic cloves, minced
6 "bird's eye" chilies, minced with seeds (or 2-3 jalapenos, if you can't find bird's eye chilies)
2 shallots (or 1 small onion), diced
10 oz. chicken (thigh or breast meat), ground or finely chopped
1 1/2 tbsp fish sauce
2 tsp brown sugar
1 big bunch Thai basil leaves, stems removed (or Sweet Italian Basil, if you can't find Thai Basil, or have regular basil growing in your garden!!)
2 dashes ground white pepper (or freshly ground black pepper, if you don't have white pepper)
Jasmine or Basmati rice for serving

Directions:
1. Heat a wok or large skillet over medium-high heat until hot.  Add oil, garlic, and chilies, and stir-fry about a minute, until the garlic is fragrant.
2. Add shallots, and stir-fry until they have wilted, about a minute more. 
3. Add chicken, and stir-fry until cooked.  
4. Add fish sauce, soy sauce, brown sugar, and pepper, and stir-fry until the liquid is pretty much evaporated.
5. Add basil, and cook until basil is wilted, but still bright green- 30 seconds or so.

Notes:
  • I  couldn't find Bird's Eye chilies- even at Whole Foods :(  But the jalapenos still tasted delicious.  Feel free to adjust the amount of peppers to your individual taste.  I'd omit the seeds if you like milder food.
  • Since I decided to make this recipe with my homegrown basil in mind, I used my Italian Basil rather than the Thai basil which has a slightly different flavor, and whose flavor is more stable when cooked, but I think that the Italian basil works just fine, and has great flavor in this dish.  I also decided to use some of my Red Rubin basil which has a slightly stronger flavor than the sweet basil, and worked awesomely in this dish as well!
  • I served my stir-fry over Jasmine rice, but you could serve this in lettuce wraps if you wanted to, or even over pasta.

Saturday, June 18, 2011

Chipotle Shrimp

Seafood is one of my most favorite types of food in the world.  Fish, shellfish, you name it- every type of seafood that I've ever tired, I've loved.  Ideally, I'd like to have it multiple times each week, but the cost of it makes me wait for the sales or special occasions.  Last week there was an awesome sale on shrimp at Whole Foods, so I snapped some up as soon as I could.  I knew immediately what I wanted to make with it- something that I've been eyeing for a while- and that was Rick Bayless' Chipotle Shrimp.  As soon as I picked up Mexican Everyday and it stared at me from the cover, I knew that I'd have to make it.

... and so I did.  Wow... if you are a fan of shrimp, a fan of spicy food, a fan of chipotle... you need to make this as soon as possible.  I'm really not exaggerating when I say it's one of the best, and easiest recipes I've made in quite some time, and I've made a lot of good stuff, so that's high praise.

So go forth and make.... really....


Chipotle Shrimp
Camarones Enchipotlados

Serves 4

Ingredients:
One 15-ounce can diced tomatoes in juice (preferably fire-roasted), drained
2-3 canned chipotle chiles en adobo
1 tbsp chipotle canning sauce
2 tbsp vegetable or olive oil
3 garlic cloves, peeled and finely chopped, or crushed through a garlic press
About 1 1/2 cups fish or chicken broth or water
Salt
1- 1 1/4 pounds medium-large shrimp (21-25 shrimp per pound), peeled and deveined, tail left on if you want
About 1/4 cilantro, loosely packed, roughly chopped
White rice for serving (if desired)

Directions:
1. Combine tomatoes, chipotle chiles, and chipotle canning sauce in a food processor.  Blend until smooth.
2. Heat oil in a large (12-inch) skillet over medium heat.  Add garlic, and saute for about 1 minute, until fragrant and golden.
3. Add tomato mixture, and cook about 5 minutes, stirring often.   Add enough chicken broth to make it the consistency of light tomato sauce.  Taste and season with salt- about 1 tsp. 
4. Add shrimp and cook about 4 minutes, until shrimp are done, stirring constantly.  If the sauce has thickened too much, add more broth or water.
5. Remove the pan from heat and serve the shrimp over white rice (if desired).  Garnish with cilantro.

Notes:
  • I used 3 chipotle chiles and it was pretty spicy!  You can definitely vary the chipotles to suit your own taste, but you'll have to add some of the chiles and adobo sauce to get the awesome flavor.  To mute the spiciness further, you can remove the seeds of the chiles if desired.
  • This was great over white rice, but you could also serve it plain, or with tortillas.  The sauce is great for dipping.
  • Scallops or other seafood would be a great substitution for the shrimp- even chicken would be good if you don't eat seafood.... and if you are a vegetarian, Bayless suggests using tofu and eggplant.
  • Other advice?  Just make it!  It's awesome!!!!

Things to Come

Look at what I discovered in my garden today!  Good things are on the horizon!


....and it's been a few days since I've posted a recipe, but I'll catch up on some of my meals this week during the weekend.  Here is a sneak peak...

Chipotle Shrimp

Omelets and Home Fries

Thai Chicken and Basil Stir-Fry


Wednesday, June 15, 2011

Sausage and Pepper Subs

Up until a few years ago I had it in my head that I hated sausage.  The only types of sausage I would eat were certain kinds of breakfast sausage, and chorizo.  I have a feeling that my aversion to sausage mostly stemmed from the way they looked, rather than the taste- although I must have tried some kind of sausage at some point when I was little- I did learn the lesson of "never judge a book by it's cover", you know.  Anywho, at some point a few years ago, I was at a party where one of the dishes was a dish of traditional Italian sausage and peppers.  Not wanting to be rude, I took a small amount onto my plate, and tried the tiniest bit, and lo and behold, it was delicious, so delicious that I went back for more, and more.  Since then, my aversion has mostly disappeared! (Except for those weird looking white knackwursts and blood sausage- someday maybe.....)

So.... sausage and peppers- delicious, n'est pas?  ....and when I saw that both Italian pork sausages and bell peppers were on sale this week, it seemed like fate was pushing me in that direction.  I've never made sausage and peppers before, so I scoured the web for a recipe that sounded good, and there were plenty.  I knew I wanted to make sandwiches with them since I had purchased two amazing tasting mini garlic-herb baguettes from Whole Foods, and so I was also looking for a specific sausage and pepper recipe having to do with sandwiches.  I finally came upon one on foodnetwork.com from Rachel Ray- before you scoff, now she may be annoying at times, but every recipe of hers I have ever tried has been good, and the idea of getting dinner on the table quick is always welcome when you usually don't get home from work until after 5.  Also, this recipe called for a few hot cherry peppers, and spiciness always calls out to me, so I couldn't look away... and these were excellent, so my stomach walked away satisfied.


Sausage and Pepper Subs
Serves: 2-3 (2 large servings with leftovers, or 3 reasonable servings)

Ingredients:
1 pound hot Italian sausage
2 tbsp extra virgin olive oil, plus more for drizzling
2 large garlic cloves, minced
1 large onion, thinly sliced
2 bell peppers (red, orange or yellow, or a combination), seeded and thinly sliced
Salt and pepper
2-3 jarred hot cherry peppers, finely chopped
3 tbsp hot cherry pepper juice, from the jar
Rolls for serving

Directions:
1. Pierce the sausage casings with a fork, and place them in a large skillet.  Add 1-inch of water to the pan.  Bring to a boil, and then lower the heat, cover the sausages, and simmer for about 10 minutes.
2. Heat another (preferably nonstick) skillet over medium heat.  Add the oil, and then garlic, onion, and bell peppers, to the pan.  Season with salt and pepper.
3. Drain the sausages, and return them to the pan, raising the heat to medium-high.  Add a drizzle of oil to the pan, and cook the sausages until the casings are brown and crisp- turning every so often to get all sides.  Remove the sausages, cut into 2 inch pieces at an angle, and put the sausages back into the pan to sear on all sides.
4. Add the sausages into the pan with the pepper and onion mixture.  Add the hot cherry peppers and pepper juice to the pan.  Mix together.
5. Serve on rolls, toasted if desired.


Notes:
  • Rachel Ray's original recipe calls for a mixture of 2 cubanelle peppers and 1 red bell pepper.  This would be great as well, but I didn't have any cubanelles on hand.  This recipe lends itself to any combination of peppers you want though.  You can do green, red, yellow, orange, cubanelle- even poblano would probably be good.  Also, in place of the hot cherry peppers, you can use banana peppers or pepperoncini.
  • The original recipe calls for 3/4 pound of sweet Italian sausage, and 3/4 pound of hot Italian sausage, for 4 servings.  By all means, feel free to use a combination, or all hot or all sweet if you want.  Chicken or turkey sausage would be great as well, although they aren't as fatty, so a little more oil for cooking may be needed.  

Monday, June 13, 2011

Chocolate and Raspberry Trifle

It's about time I had a post on here about dessert, right?  I love dessert- especially chocolate, but I really don't make my own dessert as often as I'd like to. (I like to think my waistline appreciates this!)  That may change when I get my desired ice cream machine (hopefully within the next month), but I thought I'd kick the dessert category off with a bang and make a trifle-like dessert with my beloved chocolate.  Now, this is not a traditional trifle, but hey, it has mousse (which resembles the custard layer), and brownies (which will count as the sponge cake layer), and a bit of fruit.

I was inspired by a post on Handle the Heat for a "Chocolate Dream" trifle, in which brownies were layered with the chocolate mousse, and then I decided to add raspberries for color and to give it the semblance of some health :)  I've mentioned that I am not a huge fruit eater- I like it, but I don't crave it- but there is an exception to that rule, and that is with berries.  I LOVE berries- particularly raspberries- and when I saw they were on sale at Whole Foods this week, I had to scoop some up.  I decided to leave some fresh for the top of the desert, but make the rest into a raspberry sauce, because raspberry sauce is just so pretty and easy to make.  So without further ado...


Chocolate and Raspberry Trifle

For brownie layer:
Ingredients:
5 ounces unsweetened chocolate, chopped
1 stick unsalted butter, cut into chunks
1 cup granulated sugar
1 cup brown sugar
2 tsp vanilla extract
4 large eggs
1/2 tsp kosher salt
1 cup unbleached all-purpose flour

Directions:
1. Preheat oven to 350 degrees. Cover a 13x9x2 inch pan with parchment paper (leave 1-inch overhang), and spray with nonstick cooking spray.
2. In a double boiler, melt butter and chocolate together.  OR Fill a small saucepan half full with water, place a heatproof bowl (that snuggly fits) on top, add butter and chocolate to bowl, and heat on medium, stirring occasionally until combined and melted. OR Melt the butter and chocolate together in the microwave in 30-second bursts, in a microwave safe container.  Whatever method you choose, when the butter and chocolate are melted and mixed together, transfer the mixture to the bowl of your stand mixer or a large mixing bowl, and let cook for 10 minutes.
3. Add sugar and vanilla to the chocolate, and using the mix attachment for your stand mixer, or a hand mixer, or whisk, mix together until thoroughly combined.
4. Scrape down bowl, add eggs and salt, and mix about 2-3 minutes, until lightened in color.
5. Add flour, and stir by hand until just combined.
6. Pour into your prepared baking dish, and spread evenly.  Bake 25-30 minutes, until toothpick comes out clean.  Cool in pan on cooling rack about 30 minutes. 


Notes:
  • The brownies can be made up to 3 days ahead of time, and they are also delicious just on their own.
For Chocolate Mousse layer:
Ingredients:
2 Tbsp unsalted butter
1/2 cup (4 ounces) semisweet or bittersweet chocolate
3 eggs, separated
1/4 cup sugar
1/2 cup heavy cream
1/2 tsp vanilla extract, with an extra splash

Directions:
1. In a double boiler, melt butter and chocolate together.  OR Fill a small saucepan half full with water, place a heatproof bowl (that snuggly fits) on top, add butter and chocolate to bowl, and heat on medium, stirring occasionally until combined and melted. OR Melt the butter and chocolate together in the microwave in 30-second bursts, in a microwave safe container.  Cool slightly.  
2. Whisk egg yolks into chocolate mixture, and place bowl in refrigerator.
3. Place egg whites in a large bowl, and with a large whisk or hand mixer, beat egg whites for about a minute or two.  Add half the sugar to the egg whites, and beat until they form stiff peaks, about 2 minutes.  (You can also do this in a stand mixer.)
4. Place cream in a large bowl, and beat with whisk or hand mixer about a minute.  Add remaining sugar and vanilla to cream.  Beat until cream forms soft peaks, about 2 minutes.  **Do not over beat cream, or it will form a cottage-cheese like texture**  (You can also do this in a stand mixer.)
5. Remove the chocolate mixture from the refrigerator, and transfer to a large bowl.  Mix a couple spoonfuls of the egg whites into the chocolate.  Fold in the remaining egg whites thoroughly, but gently.  Then fold in the whipped cream thoroughly, but gently.
6. Place mousse in refrigerator until chilled, at least 2 hours.


Notes:
  • The first time I attempted to make the mousse for this recipe I followed the recipe that was listed on Handle the Heat, which sounded so simple- basically just mixing heavy cream and melted chocolate together, but I failed miserably- it turned into a mess- I'm thinking that since it was kind of cottage-cheese like, I over-beat the cream, but it also started to separate as soon as I put the warm chocolate in, so I'm thinking that had something to do with it.  I decided to find a more classic recipe for my second attempt at mousse, and while this one has more steps, I think it allows for less failure, since it is a tried and true method.  Just be sure that you don't over-beat the cream like I did!
Raspberry Sauce
Ingredients:
1/2 cup fresh raspberries
1/2-1 tsp sugar
1/4 tsp lemon juice

Directions:
1. Blend raspberries, sugar and lemon juice together in food processor or blender until smooth.
2. Strain sauce through a fine, wire mesh sieve to remove the seeds.  Push the sauce through with a rubber spatula until only the seeds remain.  Discard the seeds.

Notes:
  • I used about 1/2 tsp of sugar in my sauce, and it was only very subtlety sweet, and pretty tart.  That is my own personal preference, but if you like it sweeter, you can use a larger amount of sugar.
  • I looked at many recipes for raspberry sauce- some used powdered sugar instead of granulated sugar, some included liquors, some used simple syrup, most used lemon juice.  At some point I'll fiddle around with jazzing the sauce up, but I loved the simplicity of this combination.
  • This particular recipe makes a small amount (darn you, expensive and small packaged raspberries!!).  By all means, double, triple, quadruple the recipe, just taste for desired sweet/sour combination for the amounts of sugar and lemon juice you add.

To assemble trifle:
1. Remove brownies from pan, and cut into 1-inch squares.
2. Place brownies, mousse, and raspberry sauce in alternating layers.  I did two layers of each, beginning with the brownies- so brownies, mousse, sauce, brownies, mousse, sauce.  I then topped the whole thing with a few whole raspberries that I had reserved, and a couple more brownie pieces.  You can also adorn it with some chocolate shaving if you want.  Depending on how big your dishes are, and how much you want in your layers, you can do more as desired.  You can also do just 1 layer of each component if you want.

Sunday, June 12, 2011

Coming Soon...

Pasta Salad with Cheddar Cheese, Pepperoni, Roasted Red Peppers and Chickpeas

Pasta salad seems like such a classic summer dish to me- all you have to do basically is cook up some pasta, toss in some dressing, and some ingredients of your choice.  It is a quick meal that has only a minimal amount of time in a kitchen that can be stifling in hot weather- especially when you have the 100 degree weather we had here in Connecticut this past week- that paired with the very likely chance that we would lose power due to the intense storms that were going through the state, made this a perfect dinner- although what I would have done had the power gone out mid-pasta cooking I can't quite say- I may have been out with my grill in the pouring rain trying to boil water.

So I know that the June issue of Bon Appetit told us to get away from cold fusilli salad- but hey- I love cold fusilli salad, and like I've said before- I DO WHAT I WANT!!!  Take that Bon Appetit (don't worry I still love you).  Anyways,  I used tricolor fusilli for this pasta salad because it's pretty, and then threw in some additions... since I was not just making it for myself, I had to think about things that my boyfriend likes to eat (which pretty much rules out all vegetables other than peppers).  I settled on cheddar cheese (because I have a massive amount of it in my fridge due to an awesome sale at Whole Foods), pepperoni, chickpeas, and roasted red peppers (got to have some kind of vegetable in there, right?).  For the dressing, I chose one that my mom has used on her pasta salad in the past, which I think is quite delicious, and that is Ina Garten's vinaigrette for green salad- although, I of course being the rebel I am didn't have anything resembling green in my salad- other than the spinach fusilli.  I like using a vinaigrette in pasta salad rather than a mayonnaise based dressing because that's just how I roll.


Pasta Salad with Cheddar Cheese, Pepperoni, Roasted Red Peppers and Chickpeas

Ingredients:
1 pound pasta (I used tricolor fusilli)
4 ounces pepperoni, cut into 1/2 inch cubes
2-3 ounces Cheddar Cheese, cut into 1/2 inch cubes
2-3 roasted red peppers, cut into 1/2 by 1 1/2 inch strips
1 can chickpeas, drained
Ina Garten's Vinaigrette (recipe to follow)

Directions:
1. Cook your pasta in boiling salted water until al dente, drain.
2. Toss the pasta with the pepperoni, cheese, peppers, and chickpeas.
3. Add vinaigrette, and toss everything to combine.


Notes:

  • These are pretty rough estimates for how much of each ingredient to use.  It's really all up to you individually- these are about the amounts I used this time, but you can do it all to taste- add more or less ingredient as you see fit.
  • Substitutions and additions are also welcome.  You can use mozzarella instead of cheddar.  Salami instead of pepperoni.  Add in some halved cherry tomatoes, or sundried tomatoes, or cucumber, or sauteed zucchini or summer squash.  Add what you personally like!
Ina Garten's Vinaigrette 

Ingredients:
1 tsp Dijon mustard
1 tsp minced fresh garlic
3 tbsp Champagne vinegar (or other wine vinegar- red or white)
1 tsp Kosher salt
1/2 tsp freshly ground black pepper 
1/2 cup olive oil

Directions:
1. In small bowl, whisk together mustard, garlic vinegar, salt and pepper.
2. Slowly whisk in olive oil until emulsified.


Notes:
  • I used red wine vinegar for my dressing because I didn't have any Champagne vinegar on hand and it was still perfectly delicious.
  • This vinaigrette is originally for a green salad, which you can obviously do as well, but I love the way it pairs with a pasta salad.  If serving with a green salad, it will make enough for 6-8 servings.

Thursday, June 9, 2011

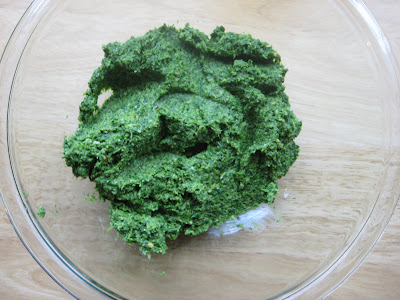
Broccoli Rabe and Walnut Pesto with Pasta

Earlier in the week my best friend invited me over and she made a delicious pasta dish with broccoli rabe and sausage for dinner.  Now because someone (with the initials GDL) didn't specify as to how big the broccoli rabe bunches should be, we were left wondering if the massive amount of broccoli rabe that 2 bunches gave us was actually the right amount, or maybe GDL's bunches are smaller.  We ended up deciding that one was enough, and so my friend had one bunch leftover, which she sent me home with (Thank's Rebecca!!).  Aren't presents of food the best?!?!  So of course I needed to do something with this broccoli rabe, and so I decided the best thing to do in this situation was to consult the ever-trusty interwebs.  After doing a bit of searching, I came upon some recipes for pesto made with broccoli rabe.  I LOVE pesto, particularly the classic basil pesto (which I'll be making soon with basil from my very own garden!), but I'm open to all types.  Even better- I had all the ingredients!  I've had some walnuts in my freezer for a while, some was used to make walnut shortbread (awesome!), but the rest of the walnuts haven't found homes yet.   This pesto seemed the perfect home.  Also- Parmesan (or pecorino cheese), olive oil, and garlic are all pantry staples for me.... and of course pasta.  This pesto turned out great!  It's a little bit bitter due to the rabe, which I quite enjoyed.  Basil pesto is still my favorite, but this is a great option if you are basiled out, or want something a little different.


Broccoli Rabe and Walnut Pesto with Pasta
Serves 4
Ingredients:
1/3 cup, plus 2 tbsp walnuts
1/2 pound broccoli rabe, trimmed
1 clove garlic
1/3 cup, plus 1 tbsp olive oil
Pinch of crushed red pepper
1/3 cup grated pecorino cheese, plus more for serving
Kosher salt and freshly ground pepper
3/4 pound pasta (I used shells, the original recipe used linguine- use whatever you want!!)

Directions:
1. Preheat oven to 350 degrees. Place walnuts in a single layer on a baking sheet or pie plate and bake about 8 minutes until fragrant and slightly toasted.  Chop 2 tbsp of the walnuts.
2. Bring two pots of salted water to a boil (one for the broccoli rabe, one for the pasta).  Add the pasta to one of the pots, and cook until al dente, according to package directions.
3. While the pasta is cooking, add the broccoli rabe to one of the pots and cook about 3 minutes until tender.  Drain the broccoli rabe, and rinse with cold water to cool.  Transfer to a cutting board, and coarsely chop.
4. In your food processor, add the garlic clove, and pulse a few times until minced.  Add 1/3 cup of walnuts, and pulse a few times, until coarsely chopped.  Add the broccoli rabe, olive oil, and crushed red pepper.  Process until the broccoli rabe is finely chopped.  Add the Pecorino cheese, and pulse a few times until just combined.  Season with salt and pepper to taste.
5. In a large bowl combine the pesto with the cooked, drained pasta.
6. Serve with a sprinkle of the reserved chopped walnuts, and a sprinkling of grated Pecorino cheese.


Notes:
  • You can make the pesto a day ahead and refrigerate until use.  Just bring the pesto up to room temperature, and then toss with the pasta.
  • If you don't have walnuts, you could substitute pine nuts, and I've seen broccoli rabe recipes using pistachios, so that would probably be fabulous as well!
  • Don't have broccoli rabe?  Regular broccoli or Broccolini would be a good substitute, and would be less bitter, if bitter's not your thing.
  • The next time I make this I'm thinking I'll add a bit more garlic, because I like things garlicky- an extra clove would be great.
  • Know what else would be good in this?  If you want some meatiness- hot Italian sausage- since the flavors go together so excellently.

Wednesday, June 8, 2011

Dough Cookies

So you have some leftover dough from that quiche, right?  Here's a little idea of what do do with it, rather than let it go to waste.  This is something my mom used to do/still does, and that is to make dough cookies with leftover pie dough.  It's simple... all you have to do is take that dough, break it into pieces about 1 to 1 1/2 inches, sprinkle them with cinnamon and sugar, and then bake.... they are muy delicioso, and quite good to snack on as you wait for your quiche to bake.


Dough Cookies

Ingredients:
Leftover Pâte Brisée
Cinnamon
Sugar

Directions:
1. Preheat oven to 375 degrees.
2. Break dough into 1-1 1/2 inch pieces, or you can get fancy and roll out the dough a a bit, and cut into 1-1 1/2 inch circles.
3. Sprinkle the dough with cinnamon and sugar.
4. Place your cookies on a nonstick baking sheet, or a baking sheet lined with foil.
5. Bake about 10 minutes, until the cookies turn golden brown.

Tuesday, June 7, 2011

Bacon and Cheddar Quiche

Once upon a time I wasn't a fan of quiche... I also wasn't a fan of scrambled eggs, or other assorted egg dishes, and then something changed!  It was a miracle that began with the addition of cheese and chives to scrambled eggs, and then branched out.  I still am grossed out by sunny side up eggs (something my boyfriend feels the need to terrorize me with now and again), but other than that I have to say I'm an egg fan.  Despite that, quiche is something I've never actually made- and neither is pie dough- so making a quiche from scratch encompassed two firsts for me.  I know there are about 7863 recipes for pie dough and quiche out there, but I decided to be all fancy-like and start with the recipe from Mastering the Art of French Cooking, because quiche is a classic French dish and all.  I have to admit that I was a bit nervous about making this- especially the dough, because it's one of those things that you have to work quickly to make or else!!

So I read the instructions a bazillion times before attempting to make the dough... and I still think I worked too slowly.  Not that the dough wasn't good- it really was good- but I feel like it could have been better.  It also puffed up way more that I think it was supposed to which could have been a variety of things- did I work to slowly?  Did the dough get too warm while  I was making it?  Did I not roll it out thin enough?  Was it because I didn't put a mold, or dry beans, or anything in the crust while I pre-baked it?  I'm not sure- maybe it was a combination.  But despite that it turned out pretty well, although I took it out a little too early at first and had to put it back in for a few minutes because after I cut it I realized it was a little underdone...  Also, Julia Child's version is pretty custardy, I think that's the way it's supposed to be, but I personally like it a little bit denser I guess (I think that's the right word for my preferred quiche texture).  For my quiche I ended up substituting cheddar cheese for Swiss, and adding bacon, so I basically combined the recipe for Quiche Lorraine and Quiche au Fromage.. but hey, I like cheese and bacon together... they are a perfect match.

With the quiche, I served a simple mesclun salad with freshly picked greens from my garden- my first crop!!!  I didn't put anything in the salad this time- just the greens and a simple vinaigrette because I wanted to get the full flavor of the greens, but maybe I'll do something fancier next time- with cheese, and toasted walnuts or something.


Mesclun Salad with Red Wine Vinaigrette


Ingredients:
For the salad:
Mesclun greens

For the vinaigrette: (makes about 1/2 cup)
2 tbsp red wine vinegar
1/8 tsp salt
1/4 tsp dry mustard
6 tbsp olive oil
Big pinch pepper
1-2 tbsp minced fresh parsley

1.  Wash and dry greens thoroughly.
2.  In a bowl, whisk together vinegar, salt and mustard.  Then slowly add oil, and season with pepper.  If you have a salad dressing shaker, or emulsifier, combine vinegar, salt, mustard and oil, and shake vigorously, or use emulsifier to combine.  Stir in parsley, taste and season as needed.
3. Place greens in individual bowls, and dress salad as desired.

Source: Adapted from Mastering the Art of French Cooking


Notes:
  • I adapted this dressing from the Sauce Vinaigrette recipe in Mastering the Art of French Cooking.  This is just a simple recipe for a vinaigrette made from any wine vinegar or combination of vinegar and lemon juice.  Feel free to substitute any vinegar of your choosing - white wine or champagne vinegar I'm sure would be good.
  • You can also add other types of fresh herbs- the herbs mentioned in the original recipe are parsley, chives, tarragon, and basil.  Or if you don't have fresh herbs, you can substitute a pinch of dry herbs. Or leave the herbs out altogether.  You can also leave out the dry mustard if you want.


Pâte Brisée


Ingredients:
2 cups all-purpose flour
1 tsp salt
1/4 tsp sugar
6 ounces (1 1/2 sticks) chilled butter, cut into 1/2-inch bits (if no food processor), or if you have a food processor, quarter the sticks lengthwise, and cut into 3/8 inch pieces
4 tbsp chilled shortening
A scant half cup iced water, plus a few droplets more as needed

Directions:
1. If you do not have a food processor: Combine flour, salt, sugar, butter, and shortening in a large mixing bowl.  Rub the mixture together rapidly between the tips of your fingers until it resembles bits of oatmeal flakes. (Do not overmix).  Then add the water and blend quickly with one hand, fingers held together and slightly cupped, and gather dough into a ball.    If there are remnants that are not part of the dough, add a few more droplets of water, and add that to the dough.  Press the dough into a ball.  If you have a food processor:  Place the flour, salt and sugar into the food processor.  Add the butter and shortening.  Then flick the machine off and on 4-5 times.  Then while the machine is running, add the ice water.  Flick the food processor on and off a few times.  The dough should mass up on the blade.  If it does not, add a few more drops of ice water, repeating as needed.  When it has massed together, scrape dough out onto lightly floured work surface, and form into a ball. (Do not overmix.)
2. On a lightly flours work surface, press your dough down with the heal of your hand and away from you quickly, about 6 inches.  (This is called the fraisage.)
3. Gather the dough into a ball, wrap in waxed paper, and refrigerate for 1 hour to overnight.

To make your partially-cooked pastry shell for the quiche:
**Work as quickly as possible to prevent the dough from getting to warm**
1. Preheat oven to 400 degrees.
2. Remove the dough from the refrigerator, unwrap, and place on a lightly floured surface,
3. If hard, hit it with your rolling pin a few times to soften it.  Knead the dough into a flat circle, and lightly flour the top of it.
4. From the center of your dough, roll the rolling pin back and forth to begin flattening the dough.  Then, with the pin always rolling away from you start rolling out the dough into a circle.  Lift the dough and turn at a slight angle and roll again.  Continue turning, and rolling, until the dough is about 1/8 inch thick, and about 2 inches larger around the sides than your pie plate.  Lightly flour the surface, and top of the dough as needed to prevent sticking.
5. Gently place your rolled out dough in your pie plate, and gently flatten into the bottom and sides of the pan.

 
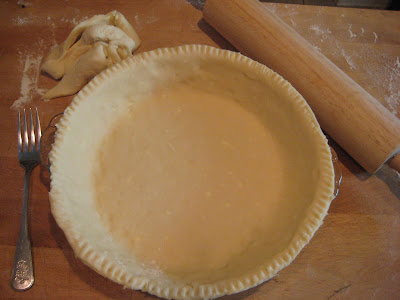
6. Trim off the excess dough around the edges, and on the edges press lightly with a fork all the way around to make a decorative edge.


7. Prick the bottom of the dough with a fork, about every 1/2 inch.
8.  If you have weights or dried beans, you can line the inside of the dough with buttered aluminum foil or buttered brown paper, and then place the weights/beans inside to weigh down the dough.  Then place in the oven and bake for 8-9 minutes.  Then remove the weights/beans, and bake for 2-3 minutes more until the shell is just beginning to color and shrink from the sides of the pan.

Source: Mastering the Art of French Cooking, Vol. 1


Cheddar and Bacon Quiche
Serves 4-6


Ingredients:
8 inch partially cooked pastry shell (made with Pâte Brisée)
3-4 ounces bacon (6-8 slices of medium thickness), cut into pieces 1 inch long and 1/4 inch wide
3 eggs or 2 eggs and 2 yolks
1 1/2 cup heavy cream, or half cream half milk
1/2 to 1 cup cheddar cheese, grated
1/2 tsp salt
Pinch of pepper
Pinch of nutmeg
1 to 2 tbsp butter, cut into pea-sized pieces


Directions:
1. Preheat oven to 375 degrees.
2. Heat a large pan over medium heat, and cook bacon until done.  Remove with a slotted spoon, and drain on paper towels.
3. In a medium bowl, beat together eggs, cream (or cream and milk), salt, pepper and nutmeg.  Stir in the grated cheese.
4. Sprinkle your bacon into the partially cooked pastry shell.  Then pour egg/cream/cheese mixture on top. Sprinkle your butter pieces over the top.
5. Place in the upper third of the oven.  Bake for 25-30 minutes, until the quiche is puffed up and browned.
6. Remove from the oven and serve.


Source: Adapted from Mastering the Art of French Cooking


Notes:

  • Make sure, when you are looking to see whether your quiche is done, that the top has actually browned, and it's not just the cheese.  I think this is why mine was underdone at first- it was just the cheese that had browned a bit, and not the rest of the quiche.
  • The original recipe for Quiche Lorraine calls for Swiss cheese, and I'd definitely like to try that.  Any good melting cheese would probably be good though- I'm thinking a Gouda (because it's my favorite).  I'd also like to experiment with some vegetable quiches- broccoli, or spinach, or asparagus would be good.
  • Quiche is definitely something I'd like to experiment with a few different recipes on- both the fillings and the pie dough.  This one was good, but it may not be my personal ideal.  Like I mentioned, I'm not so sure I was in love with the consistency.  I thought it was good, but not great for my personal tastes, but if you like custardy quiche, this may be the one for you.

Sunday, June 5, 2011

A Quick Announcement

I just felt it imperative to let you all know that between June 10-15 I will become the proud owner of a T-FAL Professional Total Nonstick Fry Pan, 12.5 inches, courtesy of my super-awesome boyfriend!!  Yay!  I'm imagining the wonderful possibilities now!  Stir-frys and omelettes here I come!


According to Cook's Illustrated in their October 2010 issue, this is the best inexpensive nonstick skillet known to man- in many ways it even beat out their high priced favorite- the All-Clad Stainless 12-inch Nonstick Frying Pan- which is over $100 more, so I expect great things from this pan.

Saturday, June 4, 2011

Turkey Burgers with Cheddar and Smoky Aioli

Now that it's unofficially summer, and I have a working outside grill, it seems the perfect time to start exploring the wonderful world of burgers.  Growing up, I admit that burgers were not my favorite meal in the world.... sorry mom and dad.  I have changed my opinion though now that I'm older, and have realized the burgers don't just have to mean a ground beef patty on a bun with ketchup and mustard.  I like the kicked up burgers with interesting toppings and lots of cheese far more than the plain burgers, and nowadays they are actually something I crave.  I am personally more a fan of turkey burgers, rather than beef, and so I decided that my first burger of the season would be one made with ground turkey.  After doing a little searching, I came upon a recipe for a grilled turkey burger with cheddar cheese and smoky aioli that originally appeared in the August 2009 issue of Bon Appetit.  This burger is seriously one of the best I've ever made- the toppings are awesome- cheddar cheese, grilled peppers and onions, and to top it off a delicious cumin and coriander spiced aioli. Really awesome!


Turkey Burgers with Cheddar and Smokey Aioli
Serves 4


Ingredients:
1/2 tsp cumin seeds
1/2 tsp coriander seeds
1/2 cup mayonnaise
2 tbsp extra-virgin olive oil, plus more for brushing veggies
2 tsp fresh lemon juice
1 1/2 tsp smoked paprika
1 garlic clove, pressed
1 pound ground turkey, preferably dark meat
4 red onion slices, 1/3-inch thick
1 large or 2 small red bell peppers, quartered
4 slices cheddar or Monterey Jack cheese
4 hamburger buns
arugula


Directions:
1. Heat a small skillet over medium heat, and toast cumin and coriander seeds about 1 1/2 minutes, or until aromatic and slightly darker in color.  Shake skillet often to move seeds around while toasting.  Once toasted, grind spices in a spice grinder, or crush in a mortar with pestle.  In a small bowl, whisk together mayonnaise, 2 tbsp olive oil, lemon juice, garlic, paprika, and spices.  Taste, and season with salt and pepper.
2. In a medium bowl gently mix turkey with 2 tbsp of the aioli (mayo mixture).  Make 4 3/4-inch patties with the turkey, and make a shallow indentation in the middle of each burger with your thumb.
3. Prepare your grill (should be about medium-high heat).  Sprinkle your burgers with salt and pepper on each side.  Brush the onions and peppers with olive oil.
4. Grill onions and peppers for about 4 minutes per side, until soft and charred.
5. Grill burgers 5 minutes on one side, then flip and grill 4 minutes.  Place cheese on burgers, and grill a minute more.
6. Assemble burgers with desired toppings- onions, peppers, arugula, and a nice dollop of aioli.

Source: culinarycovers.com, originally from Bon Appetit, August 2009


Notes:

  • I highly recommend using a grill basket for the veggies in this recipe.  I unfortunately do not have one yet, and about 1/2 my onions ended up falling into the hot coals- luckily I had sliced more that the recipe calls for, and so the survivors were enough.
  • I grilled the burger buns on the grill as well, so if you like toasted buns, place them on the grill while the burgers are cooking, checking them frequently.  Move them around a little too, if some are on a hot or less hot part of the grill, so that they are toasted evenly.
  • I used white meat ground turkey for my burgers and they turned out perfectly fine, and not too dry, but the darker meat will turn out a juicier burger.  Dark meat is harder to find though- it's not carried at the Shop and Stop I go to, but is carried at Whole Foods.
  • The aioli this makes was the best part in my opinion, and you'll probably have some left over after you put it on your burgers.  It makes a great dipping sauce for fries, so I'd say that's a good way to use any extra.


Thursday, June 2, 2011

A Memorial Day Meal: Part Deux

Here is the promised second half of my Memorial Day feast... the side dishes.


Spicy Potato Wedges

Ingredients:
Russet potatoes (1- however many you want, but 1 potato per person is a good idea)
Olive oil
Salt
Garlic Powder
Cayenne Pepper

Directions:
1. Preheat oven to 400 degrees.
2. Cut potatoes into wedges.  I'd recommend cutting into 6-8 wedges per potato depending on their size.
3. Toss the wedges in a bowl with a drizzle of olive oil, add a sprinkling of the salt and the other spices, and mix together to coat the potatoes.  I didn't measure these, and it's really up to your individual taste- like them spicy?  Add more cayenne.  Like them garlicky?  Add more garlic powder!  For a rough guide, I'd say for 4 potatoes you can use about 2 tbsp olive oil, 1/2 tsp salt, 1 tsp garlic powder, 1/4 tsp cayenne pepper.
4. Place potatoes on a baking pan, in a single layer.
5. Cook about 40 minutes, flipping the wedges once.


Tomato, Cucumber and Feta Salad


Ingredients:
2 pints cherry or grape tomatoes (quartered if cherry, halved if grape)
1/4 tsp salt
1/2 tsp sugar
2 cloves garlic, minced or pressed
1/2 tsp dried oregano
1 medium shallot, minced
1 tbsp red wine vinegar
2 tbsp extra virgin olive oil
Ground black pepper
1 small cucumber, peeled, seeded and diced into 1/2 inch chunks
1-2 tbsp fresh parsley, minced

Directions:
1. In a medium bowl, toss together tomatoes, salt and sugar.  Let sit for about 30 minutes.  Put the tomatoes in a salad spinner, and spin for about 1 minute, to remove seeds and juice.  Stir the tomatoes around several times while spinning.  If you don't have a salad spinner, place the tomatoes in a bowl, cover securely with plastic wrap, and shake gently to loosen seeds, and release liquid.  Strain the liquid from the tomatoes through a fine mesh strainer into a measuring cup.
2. In a small saucepan, combine 1/2 cup of the reserved tomato liquid, garlic, oregano, shallot, and red wine vinegar, and heat on medium.  Simmer about 6-8 minutes, until the mixture is reduced.  Remove from the heat, pour into a small bowl, and let cook to room temperature.  When cooled, whisk in the olive oil, and season to taste with the black pepper.
3. Combine the tomatoes, cucumber, feta, parsley and dressing in a medium bowl.  Toss to combine.

Source: Annie's Eats, originally from Cook's Illustrated

Notes:

  • I used grape tomatoes in my salad, halving them.  It may take a bit of extra work to get the liquid and seeds to release from these, so you may have to toss the tomatoes around a bit more and squeeze them gently to release their seeds and a little more liquid.  I actually only got about 1/4 cup of tomato liquid for my dressing, but it still turned out perfectly fine, so don't fret if the same happens to you.


Cheddar Cheese Biscuits
Makes about 8 biscuits

Ingredients:
2 cups unbleached all-purpose flour
2 tsp sugar
2 tsp baking powder
1/2 tsp salt
1/2 cup cheddar cheese, cut into 1/4 inch cubes
1 1/2 cups heavy cream

Directions:
1. Preheat oven to 425 degrees, placing over rack in upper middle position.
2. Line a baking sheet with parchment paper.
3. Combine flour, sugar, baking powder, and salt in a medium bowl.  Stir in cheese.  Pour 1 1/4 cup of the cream in, and stir together for about 30 seconds, or until it forms into dough.
4. Remove dough to a lightly floured surface.  Leave behind any dry pieces of flour in the bowl.  If there is extra flour in the bowl, combine with the remaining 1/4 cup of cream, in tbsp increments, until moistened.  When moistened, add them to the rest of the dough.  Knead for about 30 seconds, by hand, until the dough is smooth.
5. To make biscuit rounds, flatten the dough into a 1-inch thick circle.  Use a round biscuit cutter to make bisuits, and place them on baking sheet.  Reform circle with leftover dough, and cut more biscuits.  This will make about 8 biscuits.  You can also make biscuit wedges by placing the dough in an 8 inch cake pan, and flattening evenly.  Remove dough and place on lightly floured surface, and cut into 8 wedges.
6. Bake biscuits for 15-18 minutes.

Source: cooklikeachampionblog.com, originally adapted from Baking Illustrated


Notes:
  • When making my biscuits, I didn't have any remaining flour in my bowl, so I ended up only using 1 1/4 cups of cream, so you may not need to do this step either. 
  • I ended up doing wedges because I realized as I was making these that I don't have a biscuit cutter.  I'm sure I could have used something else to make a circle shape, but wedges are cool, so that's what I went with.  I loved the cake pan trick, because it made a perfect circle with no effort, and so it was super easy to make equal sized wedges.
  • You can make these into regular biscuits by just omitting the cheddar cheese, the amount of the other ingredients remains the same- but why wouldn't you want cheese?!?!?!?  I also think that adding bacon or scallions would be awesome in these biscuits.
  • Using diced cheese, rather than grated cheese, was an awesome idea- it gives you these little pockets of wonderful cheesy goodness.  I have to say these are the best biscuits I have ever made- although I still have yet to try duplicating Red Lobster's biscuits...

A Memorial Day Meal: Part 1

Finally, the long awaited post on just what I made for Memorial Day- I know you've been desperately awaiting this post :)

Since the grill has finally been put together (it only took about 2 years), I decided that I must cook something on it- something meaty and made for the grill.  I decided on a London Broil, because I figured it's one of the simplest things to make- and simple and delicious it was.  I have a tendency to overcook meat, and so I carefully researched just how much time I needed to cook this piece of meat for medium-rare.  The consensus I got was about 5 minutes per side over a hot fire, or 6-8 minutes per side over a medium fire.  I'm not up on the art of measuring just how hot my grill is yet- more research awaits me- but it seemed pretty hot, so I did 5 minutes on the first side, and 6 on the second, and then let it rest for about 5-10 minutes before slicing, and it turned out perfectly!

I wanted to make some sides to serve with the London Broil as well, so I went with a tomato, feta and cucumber salad that I saw on Annie's Eats recently, and this turned out to be the absolute best tomato salad I have ever had.  I also had 1 russet potato that I wanted to use up, and some heavy cream.  For the potato I ended up cutting it in smallish wedges, adding some spices, and roasting it in the oven, which didn't make a lot, but was enough with the the other sides... and with the cream I decided on some awesome cheddar cheese biscuits, with are probably the best biscuits I have ever made.  It was pretty hard to not wolf down all of them in one sitting- they are very rich though, so that's probably not such a good idea.

The main dish, the London Broil, will star in this post, and part 2 will have the recipes for the sides.


London Broil


Ingredients:
1 pound London Broil
Equal parts lemon juice, soy sauce and honey.  I used about a 1/2 cup of each.


Directions:
1.  Whisk together the lemon juice, soy sauce and honey in a container big enough to hold your meat.  I used an 8"x8" glass baking dish.  Make a few shallow cuts in your meat on each side (about 4-5 per side), and place meat in the dish with the marinade.  Marinate for a while, depending on how long you have.  A few hours is okay, but the longer the better.  I marinated mine for about 24 hours.  Turn at least once while marinating.
2. Grill the meat about 5-6 minutes per side for medium rare over a high fire, or 6-8 minutes over a medium fire.
3. Slice meat thinly and serve.


Notes:

  • The marinade that I used is one that my mom and my grandmother have been using for London Broil for as long as I remember.  I actually have no idea where it came from, but if I get a source for the recipe I'll be sure to let you know.  I love this marinade though, it really couldn't be simpler, and is the perfect blend of sweet and sour.