Spring really seems to have arrived here in Connecticut! I actually have been able to go outside without a winter coat, and have had to turn on the air conditioner while driving around in my car. I am extremely excited about this development! We have a couple of 40-something degree days this week, but the rest of the 10-day forecast is in the 50's, with a couple of days reaching 60!! I know it's mundane to talk about the weather, but hey, if I'm excited about it, I assume others are too! Now, this dinner is not spring-like at all, but it is still worth sharing! This is from week 3 of the Whole Living Action Plan (I have one left to share after this before I get back to our regularly scheduled programming).
I love squash! Acorn, butternut, spaghetti, delicata... They are all good to me. This stuffed squash is a really good, hearty way to make squash a main dish. It would be wonderful to have in the fall (or winter, spring or even summer if you want to turn on your oven), and I think it would make a fabulous vegetarian/vegan main dish for Thanksgiving!!
Stuffed Acorn Squash
Serves 2
Ingredients:
1 acorn squash, halved and seeded
3 Tbsp plus 1 tsp extra-virgin olive oil, divided
Coarse salt and freshly ground black pepper
1 large onion, diced
1 tsp fresh sage, chopped
1 tsp fresh thyme
1/3 cooked white beans
1/3 cup cooked quinoa
1 cup kale, chopped
2 Tbsp toasted* hazelnuts, chopped
Directions:
1. Preheat oven to 400 degrees. Line a baking sheet with tinfoil. Brush the cut sides of the squash with 1 tsp olive oil. Season with salt and pepper. Place on baking sheet, cut side down, and roast for 30 minutes. Remove from oven, flip squash over, and set aside.
2. While the squash is roasting, heat 1 Tbsp of oil in a medium skillet over medium heat. Add onion, and sauté, stirring frequently, about 6 minutes, until tender. Add the sage, thyme, beans, quinoa and kale to the onion, and cook about 2 minutes, until the kale is wilted. Season to taste with salt and pepper.
3. Stuff each half of the acorn squash with half of the quinoa-bean mixture. Roast about 15-20 minutes, until golden.
4. To serve, top each acorn squash half with 1 Tbsp hazelnuts, 1 Tbsp olive oil, and a squeeze of lemon.
Source: Whole Living, January/February 2013
*To toast hazelnuts, preheat oven to 350 degrees. Place hazelnuts on a baking sheet, and roast for 10-15 minutes, until golden brown.
Showing posts with label Vegetarian. Show all posts
Monday, April 1, 2013
Tuesday, March 26, 2013
Roasted Vegetables with Quinoa
Another of my favorites from week 2 of the Whole Living Action Plan, these roasted vegetables were so filling and flavorful! Seriously guys, this dish was so good! I love butternut squash and Brussels sprouts already, and roasting them is definitely the way to go, but tossing them with smoked paprika gives the vegetables another amazing layer of flavor. Smoked paprika has to be one of my favorite spices ever, but I don't cook with it nearly enough. The sauce that is mixed with this dish, and then served on top is also a wonderful thing! Who would have thought the combination of tahini, apple cider vinegar and some herbs could be so wonderful. I love all those flavors separately, but I never would have thought to put them together. Definitely a winning dish!
Roasted Vegetables with Quinoa
Serves 2
Ingredients:
3 cups butternut squash, diced
2 cups Brussels sprouts, trimmed and halved
2 Tbsp melted coconut oil or extra-virgin olive oil
Coarse salt and freshly ground black pepper
1 tsp smoked paprika
1 clove garlic
2 Tbsp tahini
3 Tbsp apple cider vinegar
2 Tbsp extra-virgin olive oil
2 Tbsp water
1/4 cup fresh chives, chopped
1/4 cup fresh parsley, chopped
1/4 cup fresh cilantro, chopped
1 cup cooked Quinoa
2 1/2 cups baby spinach, divided
Directions:
1. Preheat oven to 425 degrees. Line a baking sheet with aluminum foil, and on the baking sheet toss together the butternut squash, olive oil or coconut oil, salt, pepper. and smoked paprika. Roast for 25-30 minutes, until cooked through and golden brown.
2. To make the sauce, add the garlic, tahini, vinegar, olive oil, water, chives, parsley and cilantro to a food processor. Pulse together until smooth. Season to taste with salt and pepper.
3. Toss the roasted vegetables, Quinoa and 2 Tbsp of the sauce together in a large bowl.
4. To serve, toss each serving with 1 1/4 cups baby spinach. Drizzle with remaining sauce, to taste.
Source: Whole Living, January/February 2013
Smoked Paprika previously: Grilled Shrimp and Sausage Skewers with Smoky Paprika Glaze
Roasted Vegetables with Quinoa
Serves 2
Ingredients:
3 cups butternut squash, diced
2 cups Brussels sprouts, trimmed and halved
2 Tbsp melted coconut oil or extra-virgin olive oil
Coarse salt and freshly ground black pepper
1 tsp smoked paprika
1 clove garlic
2 Tbsp tahini
3 Tbsp apple cider vinegar
2 Tbsp extra-virgin olive oil
2 Tbsp water
1/4 cup fresh chives, chopped
1/4 cup fresh parsley, chopped
1/4 cup fresh cilantro, chopped
1 cup cooked Quinoa
2 1/2 cups baby spinach, divided
Directions:
1. Preheat oven to 425 degrees. Line a baking sheet with aluminum foil, and on the baking sheet toss together the butternut squash, olive oil or coconut oil, salt, pepper. and smoked paprika. Roast for 25-30 minutes, until cooked through and golden brown.
2. To make the sauce, add the garlic, tahini, vinegar, olive oil, water, chives, parsley and cilantro to a food processor. Pulse together until smooth. Season to taste with salt and pepper.
3. Toss the roasted vegetables, Quinoa and 2 Tbsp of the sauce together in a large bowl.
4. To serve, toss each serving with 1 1/4 cups baby spinach. Drizzle with remaining sauce, to taste.
Source: Whole Living, January/February 2013
Smoked Paprika previously: Grilled Shrimp and Sausage Skewers with Smoky Paprika Glaze
Saturday, March 23, 2013
Black Bean-Brown Rice Patties
Happy weekend everyone! I hope spring has started well for you all. It's still quite cold here in CT and it'll be a few weeks more before we actually start feeling any spring-like weather, but for now I'm enjoying the lengthening of days and searching for signs of buds and shoots pushing up from the earth. It looks like we possibly might have snow on Monday, and honesty, that doesn't bother me at all. That's just one of the things I expect from living in New England. The snow this winter has not burnt me out yet!
These patties are a wonderful light, but hearty meal, that are one of my top contenders for my favorite recipe of the cleanse. I served mine with romaine lettuce drizzled with olive oil and lime juice, with some buttery avocado and cilantro on top. I didn't even miss having a bun for these patties. The only issue was that they were a bit dry, so maybe next time I'd add a little bit more oil, or possibly bake them a bit less. Regardless of this though, they were fabulous!
Makes 6 Patties (Serves 2-3)
Ingredients:
1 15-oz can black beans, rinsed and drained
1 3/4 cup cooked brown rice (For reference, 1/2 cup uncooked rice will yield about 1 1/2 cups cooked rice)
2 scallions, chopped
2 cloves garlic, chopped
1 jalapeno, stemmed, seeded and chopped
1 Tbsp flaxmeal
1 tsp ground cumin
2 Tbsp extra-virgin olive oil, plus more for drizzling
Coarse salt
Directions
1. Preheat oven to 425 degrees. Line a baking sheet with parchment paper.
2. Add all ingredients to food processor, and pulse until combined. Season to taste with salt.
3. Form 6 patties, about 1-inch thick. Place patties on prepared baking sheet. Drizzle with olive oil. Bake about 20-minutes, until the tops are crisp and golden.
You can serve these plain if you'd like, but they are fabulous with a few extras- some ideas: lettuce, tomatoes, avocado, red onion, cilantro. Drizzle with a little olive oil and a squeeze of lime.
Labels:
Black Beans,
Brown Rice,
Gluten-Free,
Healthy,
Main Dish,
Rice,
Vegan,
Vegetarian
Tuesday, March 19, 2013
Red Lentil and Sweet Potato Stew
I wanted to share with you one more of my favorite meals from week 1 of the Whole Living 2013 Action Plan. This red lentil and sweet potato stew is so flavorful and exciting it is hard to believe that it is incredibly healthy for you. Full of fragrant spices, sweet peppers and sweet potatoes, and those wonderful red lentils, this is something I see myself making time and time again. It was one of my favorite meals of the whole cleanse. Speaking of- I completed it this past Saturday! It was a wonderful experience and something I could see myself doing once a year! That said, I did indulge in pretty much everything that was off-limits on Sunday. I probably should have eased back in to eating gluten, dairy, meat, sugar, and coffee, but I couldn't help myself! I needed that large coffee, bacon, egg and cheese sandwich, and those chocolate stout cupcakes! I do plan on keeping up with the healthy eating most of the time however, with only occasional splurge meals.
I'll definitely be sharing a few more of my favorite meals from the Action Plan, so stay tuned! And then, once I update you on those healthy recipes I want to share with you the recipe for the chocolate stout cupcakes I made for St. Patrick's Day (aka the BEST chocolate cupcakes in the world), and also a recipe for an awesome Buffalo Chicken Salad.
One more thing I wanted to share- my best friend (who I did this cleanse with, and whose Maid of Honor I'll be in her November wedding) just started her own blog, Living Life Brightly, and would love for you to check it out! She has a great write-up on her experience with the Whole Living Action Plan over there!
Red Lentil and Sweet Potato Stew
Serves 4
Ingredients:
2 Tbsp coconut or extra-virgin olive oil
1 tsp ground cumin
1 tsp ground turmeric
1 Tbsp curry powder
1 large onion, diced
Coarse salt and freshly ground black pepper
4 cloves garlic, minced
2 Tbsp fresh ginger, minced
2 sweet potatoes, peeled and diced
1 red bell pepper, diced
1 1/2 cups red lentils, rinsed
6 cups cleansing broth or vegetable broth
Fresh cilantro, chopped
Directions:
1. Over medium heat, heat oil in a large pot. Add cumin, turmeric and curry powder and cook about 1-2 minutes, until fragrant. Add onion and a few pinches of salt, and cook about 6 minutes until tender, stirring frequently. Add garlic and ginger and cook about 2 minutes, until tender, stirring frequently. Add sweet potatoes and red bell peppers, and cook for a minute.
2. Add lentils and broth, and bring to a boil. Reduce heat and simmer 20-25 minutes until lentils are tender.Season to taste with salt and pepper. Garnish with cilantro.
Source: Whole Living Magazine, January/February 2013
I'll definitely be sharing a few more of my favorite meals from the Action Plan, so stay tuned! And then, once I update you on those healthy recipes I want to share with you the recipe for the chocolate stout cupcakes I made for St. Patrick's Day (aka the BEST chocolate cupcakes in the world), and also a recipe for an awesome Buffalo Chicken Salad.
One more thing I wanted to share- my best friend (who I did this cleanse with, and whose Maid of Honor I'll be in her November wedding) just started her own blog, Living Life Brightly, and would love for you to check it out! She has a great write-up on her experience with the Whole Living Action Plan over there!
Red Lentil and Sweet Potato Stew
Serves 4
Ingredients:
2 Tbsp coconut or extra-virgin olive oil
1 tsp ground cumin
1 tsp ground turmeric
1 Tbsp curry powder
1 large onion, diced
Coarse salt and freshly ground black pepper
4 cloves garlic, minced
2 Tbsp fresh ginger, minced
2 sweet potatoes, peeled and diced
1 red bell pepper, diced
1 1/2 cups red lentils, rinsed
6 cups cleansing broth or vegetable broth
Fresh cilantro, chopped
Directions:
1. Over medium heat, heat oil in a large pot. Add cumin, turmeric and curry powder and cook about 1-2 minutes, until fragrant. Add onion and a few pinches of salt, and cook about 6 minutes until tender, stirring frequently. Add garlic and ginger and cook about 2 minutes, until tender, stirring frequently. Add sweet potatoes and red bell peppers, and cook for a minute.
2. Add lentils and broth, and bring to a boil. Reduce heat and simmer 20-25 minutes until lentils are tender.Season to taste with salt and pepper. Garnish with cilantro.
Source: Whole Living Magazine, January/February 2013
Labels:
Gluten-Free,
Healthy,
Lentils,
Main Dish,
Stew,
Sweet Potatoes,
Vegan,
Vegetarian
Sunday, March 10, 2013
Roasted Beets on Greens
My mom always says that when I was a baby I LOVED beets. I have to laugh when I think about how much of a mess I must have made trying to eat beets- the stains that must have resulted from that! Nowadays I still love beets, but it is so rare that I actually eat them.
Ron is so picky about vegetables that I pretty much stick to those he'll eat- lettuce, peppers, onions, cucumbers, mushrooms (I know- not technically a vegetable)... This is another reason that I've been enjoying this detox- I actually have a reason to buy vegetables I don't usually purchase, and it has also allowed me to make some things for myself that I wouldn't ordinarily have made, as I try to cook things that Ron will eat as well. This has allowed me to discover some really great recipes, and also has inspired me to seek out more variation in meals (such as lunch) that I am only cooking for myself.
These roasted beets on green were great! At first glance I did not think this recipe would satisfy me, but the amount of food is deceptive. I also was a little leery of using the fennel seeds and caraway seeds in the vinaigrette as they are not (or at least I thought they weren't) my favorite flavors, but I ended up loving the flavors in this. I had this as a lunch the first week of the detox, but it could also work as a side dish to a more substantial main dish if you cut down the portions.
Roasted Beets on Greens
Serves 4 (as a main)
Ingredients:
2 bunches beets, trimmed
3 Tbsp extra-virgin olive oil
Juice of 1 lemon
2 tsp honey
1 clove garlic, minced
1 tsp fennel seeds
1 tsp caraway seeds
Coarse salt and freshly ground black pepper
4 cups baby spinach, divided
1 cup fresh parsley leaves, divided
Thinly sliced red onion
Directions:
1. Preheat oven to 400 degrees. Wrap beet in tinfoil, and roast for about an hour, until tender. Remove from oven, let cool, and then peel the beets and dice them.
2. In a medium bowl, whisk together the olive oil, lemon juice, honey, garlic, fennel, and caraway seeds. Season to taste with salt and pepper. Add the beets to the bowl, and toss together.
3. To serve, toss each serving of beets with 1 cup of baby spinach and 1/4 cup of parsley. Season to taste with salt and pepper. Top with slices of red onion.
Source: Whole Living, January/February 2013
Ron is so picky about vegetables that I pretty much stick to those he'll eat- lettuce, peppers, onions, cucumbers, mushrooms (I know- not technically a vegetable)... This is another reason that I've been enjoying this detox- I actually have a reason to buy vegetables I don't usually purchase, and it has also allowed me to make some things for myself that I wouldn't ordinarily have made, as I try to cook things that Ron will eat as well. This has allowed me to discover some really great recipes, and also has inspired me to seek out more variation in meals (such as lunch) that I am only cooking for myself.
These roasted beets on green were great! At first glance I did not think this recipe would satisfy me, but the amount of food is deceptive. I also was a little leery of using the fennel seeds and caraway seeds in the vinaigrette as they are not (or at least I thought they weren't) my favorite flavors, but I ended up loving the flavors in this. I had this as a lunch the first week of the detox, but it could also work as a side dish to a more substantial main dish if you cut down the portions.
Roasted Beets on Greens
Serves 4 (as a main)
Ingredients:
2 bunches beets, trimmed
3 Tbsp extra-virgin olive oil
Juice of 1 lemon
2 tsp honey
1 clove garlic, minced
1 tsp fennel seeds
1 tsp caraway seeds
Coarse salt and freshly ground black pepper
4 cups baby spinach, divided
1 cup fresh parsley leaves, divided
Thinly sliced red onion
Directions:
1. Preheat oven to 400 degrees. Wrap beet in tinfoil, and roast for about an hour, until tender. Remove from oven, let cool, and then peel the beets and dice them.
2. In a medium bowl, whisk together the olive oil, lemon juice, honey, garlic, fennel, and caraway seeds. Season to taste with salt and pepper. Add the beets to the bowl, and toss together.
3. To serve, toss each serving of beets with 1 cup of baby spinach and 1/4 cup of parsley. Season to taste with salt and pepper. Top with slices of red onion.
Source: Whole Living, January/February 2013
Labels:
Baby Spinach,
Beets,
Gluten-Free,
Healthy,
Main Dish,
Salad,
Vegan,
Vegetarian
Saturday, March 9, 2013
Cauliflower "Rice" Stir-Fry
Wow! I really didn't mean to go so long without posting! Time is speeding by, and I just can't keep up with it. How is it already March?! Soon buds will be sprouting on the trees, flowers will be blooming, I'll be able to open the windows in my apartment, and I'll be able to go outside without a coat. It's insane how time is speeding by.
Anyway.... As I mentioned in one of my last posts, my best friend and I decided to do the Whole Living Cleanse as a healthy living challenge and we are currently about 2/3 into it! It's been hard at times (the beginning especially), but really good! I'm definitely feeling healthier and have even dropped a few pounds! The cleanse has you omit certain things from your diet- dairy, gluten, meat, processed foods, added sugar, alcohol and coffee. The things I'm struggling the most with are not drinking coffee, and my cravings for salty things and carbs. I really haven't been craving sugar at all, and I'm doing fine without the meat and dairy. This cleanse has made me realize just how much mindless snacking I do in my everyday life- I realize that I just reach for a handful of this here, and a handful of that there and it really adds up, so I think this cleanse has been great as it has made me be mindful of what enters my body. I can definitely see myself keeping up with this way of eating in some capacity when it is finished. Limiting my intake of processed foods and added sugars especially. I will definitely be getting a cup of coffee as soon as this is done however- I think the research on the benefits of coffee supports me on that too :)
So doing this cleanse has definitely been not quite as hard as it could be due to the mostly delicious recipes it has encompassed. I wanted to share some of my favorites here, but go to the website for the remainder!! My favorite of the first week was this cauliflower "rice" stir-fry. I loved using the cauliflower as a rice substiiute! I've seen this done, but have never tried it myself. Of course it doesn't taste quite like rice, but it is super delicious and if you looking at lowering your carb intake, this is a great way to do it.
Cauliflower "Rice" Stir-Fry
Serves 2
Ingredients:
2 cups cauliflower florets
2 Tbsp coconut or extra-virgin olive oil, divided
1 sliced red onion, divided
4 cloves garlic, minced, divided
Coarse salt
1/4 cup cleansing broth, or vegetable broth
1 Tbsp fresh ginger, minced
1 small red chile, thinly sliced
2 cups broccoli florets
1 large carrot, julienned
1/2 red bell pepper, stemmed, seeded, and diced
Juice of 1/2 lemon
2 Tbsp shelled pumpkin seeds
2 Tbsp fresh cilantro leaves
Directions:
1. In a food processor pulse cauliflower florets until finely chopped.
2. In a large skillet, heat one Tbsp of oil over medium heat. Add half of the onion and half of the garlic, and cook about 6 minutes, until tender, stirring frequently. Add cauliflower. Season with salt. Add broth, and place cover on pan. Steam about 6 minutes until the cauliflower is tender, and the broth has evaporated. Remove to a bowl and cover to keep warm.
3. Wipe out pan, and add remaining oil. Increase the heat to medium-high. Add remaining onion, and cook about 5 minutes until tender. Add remaining garlic, ginger, and chile, and cook for 1 minute. Add the broccoli, carrot and red pepper, and cook about 5 minutes, until tender, stirring occasionally. Season to taste with salt.
4. Remove from heat and add lemon juice.
5. When serving, sprinkle pumpkin seeds and cilantro on top of the stir-fry.
Source: Whole Living, January/February 2013
Anyway.... As I mentioned in one of my last posts, my best friend and I decided to do the Whole Living Cleanse as a healthy living challenge and we are currently about 2/3 into it! It's been hard at times (the beginning especially), but really good! I'm definitely feeling healthier and have even dropped a few pounds! The cleanse has you omit certain things from your diet- dairy, gluten, meat, processed foods, added sugar, alcohol and coffee. The things I'm struggling the most with are not drinking coffee, and my cravings for salty things and carbs. I really haven't been craving sugar at all, and I'm doing fine without the meat and dairy. This cleanse has made me realize just how much mindless snacking I do in my everyday life- I realize that I just reach for a handful of this here, and a handful of that there and it really adds up, so I think this cleanse has been great as it has made me be mindful of what enters my body. I can definitely see myself keeping up with this way of eating in some capacity when it is finished. Limiting my intake of processed foods and added sugars especially. I will definitely be getting a cup of coffee as soon as this is done however- I think the research on the benefits of coffee supports me on that too :)
So doing this cleanse has definitely been not quite as hard as it could be due to the mostly delicious recipes it has encompassed. I wanted to share some of my favorites here, but go to the website for the remainder!! My favorite of the first week was this cauliflower "rice" stir-fry. I loved using the cauliflower as a rice substiiute! I've seen this done, but have never tried it myself. Of course it doesn't taste quite like rice, but it is super delicious and if you looking at lowering your carb intake, this is a great way to do it.
Cauliflower "Rice" Stir-Fry
Serves 2
Ingredients:
2 cups cauliflower florets
2 Tbsp coconut or extra-virgin olive oil, divided
1 sliced red onion, divided
4 cloves garlic, minced, divided
Coarse salt
1/4 cup cleansing broth, or vegetable broth
1 Tbsp fresh ginger, minced
1 small red chile, thinly sliced
2 cups broccoli florets
1 large carrot, julienned
1/2 red bell pepper, stemmed, seeded, and diced
Juice of 1/2 lemon
2 Tbsp shelled pumpkin seeds
2 Tbsp fresh cilantro leaves
Directions:
1. In a food processor pulse cauliflower florets until finely chopped.
2. In a large skillet, heat one Tbsp of oil over medium heat. Add half of the onion and half of the garlic, and cook about 6 minutes, until tender, stirring frequently. Add cauliflower. Season with salt. Add broth, and place cover on pan. Steam about 6 minutes until the cauliflower is tender, and the broth has evaporated. Remove to a bowl and cover to keep warm.
3. Wipe out pan, and add remaining oil. Increase the heat to medium-high. Add remaining onion, and cook about 5 minutes until tender. Add remaining garlic, ginger, and chile, and cook for 1 minute. Add the broccoli, carrot and red pepper, and cook about 5 minutes, until tender, stirring occasionally. Season to taste with salt.
4. Remove from heat and add lemon juice.
5. When serving, sprinkle pumpkin seeds and cilantro on top of the stir-fry.
Source: Whole Living, January/February 2013
Labels:
Broccoli,
Carrot,
Cauliflower,
Gluten-Free,
Healthy,
Main Dish,
Red Pepper,
Vegan,
Vegetarian
Sunday, February 3, 2013
Artichoke and Basil Bruschetta
This weekend my Grandmother and I celebrated our birthdays! I still have 2 weeks until I reach the milestone age of 30, but since I can remember we've always celebrated our birthdays together, as they are so close together. Hers is the 2nd and mine, the 17th. This year we are both celebrating big birthdays- my 30th as I said, and her 80th!! It was a great party- lots of delicious food (of which I unfortunately got no pictures). We had a surf and turf feast- London broil, seafood chowder, paella, oysters... It was all delicious! We had cheesecake and a chocolate-hazelnut cake to finish the evening.
I brought an appetizer- this artichoke and basil bruschetta! I made it in the summer for a birthday party and loved it so much I just had to make it again, and then I had to make more for a light dinner tonight as I didn't eat my fill yesterday! This is such an easy appetizer to make- the assembly is the only thing that takes a little time, but it is so worth it. This comes from one of my favorite blogs- Shutterbean- go check it out if you haven't heard of it! And if you are into podcasts, I heartily recommend the Joy the Baker Podcast, which Tracy from Shutterbean and Joy the Baker of course do. It's hilarious, sometimes informative, and always entertaining!
Artichoke and Basil Bruschetta
Makes about 20
Ingredients:
1 Baguette, thinly sliced on the diagonal
1/3 cup olive oil
1-2 cloves garlic
12 oz. jar marinated artichoke hearts
1 1/4 cups ricotta cheese (I used part-skim)
10-20 Basil leaves
20 shavings of Parmesan cheese
Fresh lemon juice
salt and freshly ground black pepper
Directions:
1. Preheat oven to 350 degrees. Place baguette slices on a baking sheet, and brush with olive oil. Bake about 5-10 minutes until lightly crispy.
2. When the slices are toasted, remove from oven, let cool slightly, and then rub with a garlic clove.
3. To assemble, spread each baguette slice with about 1/2 tablespoon ricotta, then lay on a basil leaf (if large, tear in half), then an artichoke heart (again, if large, can be halved), then a shaving of Parmesan. Squeeze a little lemon juice on each bruschetta, and sprinkle with salt and pepper.
Source: Shutterbean
Labels:
Appetizer,
Artichoke,
Basil,
Bruschetta,
Crostini,
Ricotta,
Vegetarian
Tuesday, January 15, 2013
Sweet Potato Latkes
After eating the same thing for dinner three nights in a row, I really needed a change. Since I've been trying to use up what is in my pantry, and Ron has been working the last three nights, I ended up making very simple cheese and jalapeño quesadillas with rice and beans for myself for the past few nights. Very yummy, but even quesadillas get old after having the same kind three days in a row, I suppose.
So for this dinner I needed something vastly different using ingredients I had in the pantry. I had a few sweet potatoes that I really wanted to use, and so after searching through some of my favorite blogs for ideas, I came upon these sweet potato latkes on Eat, Live, Run. Just a few staple ingredients, a little mixing together, a little frying, and bam, done. I don't generally like to fry things in my kitchen, but because you only need a little bit of oil for these, that wasn't a problem. I ate them with a little bit of pure maple syrup on top and they were so satisfying! I guess you probably would normally serve these as breakfast or as a side dish to a meal, but since it was just me, I decided to just make these my main dish and eat a simple salad on the side. I will definitely be making these again! I also would love to experiment with these a bit too- I'm thinking chipotle sweet potato latkes... And I also really need to make traditional potato latkes sometime as well.
Sweet Potato Latkes
Makes about 8 latkes
Inredients:
2 small to medium sweet potatoes, peeled and shredded
2 eggs, beaten
1/4 cup all-purpose flour
1/2 tsp salt
1/2 tsp cinnamon
Canola oil, for frying
Maple syrup, optional
Directions:
1. In a large bowl, mix together the shredded potatoes, eggs, flour, salt and cinnamon.
2. Add about a tbsp of canola oil to a large skillet, and heat over medium-high heat. When hot, using wet hands, form your latkes, and place in skillet. (This will probably take you two batches- four latkes per batch). Fry about 3 minutes on each side, until golden brown. Repeat with remaining latkes.
3. Serve warm. Drizzle with maple syrup if desired!
Source: Eat, Live, Run
Friday, July 27, 2012
Kale and Coconut Salad
I've had this recipe on my radar to try ever since I saw it on a couple of my favorite blogs- first Shutterbean and then Joy the Baker. After seeing many bloggers posting recipes from Heidi Swanson's cookbook Super Natural Every Day, which this recipe is from, I had to buy it myself. I guess you could call it peer pressure- but the good kind, not the jumping off a cliff kind. After going to the farmer's market today, and buying a ginormous bunch of kale, I knew that tonight was the perfect night to finally try out this recipe. I already had the coconut from some granola I made a few weeks ago, and the other ingredients are all pantry staples for me.... it was just meant to be! Perfect for a night when my meat-loving boyfriend is at work, and it's just me at home, left to my own devices.... which also includes watching episodes of "Friends" back to back to back, menu planning for next week, and general laziness! Hey, I already did my workout this morning, so that justifies being lazy for the rest of the day! I guess this is what constitutes a wild and crazy Friday night when you're 29 1/2 :)
This turned out to be everything I wanted it to be. Crunchy, chewy, salty, and just downright tasty. I loved it and could easily have eaten the whole batch in one sitting. Darn you portion control!! I had some brown rice in my freezer that I heated up to go with this (seriously one of the best things to do ever- precooking long cooking grains in big batches and freezing for later), and squirted on a touch of sriracha (thanks Joy the Baker for the idea!), and it was sooooooo good. I didn't even use half of my kale for this salad, so I envision lots of this salad in the next few days- I could easily eat it for every meal.
Kale and Coconut Salad
Serves 4
Ingredients:
1/3 cup extra-virgin olive oil
1 tsp sesame oil
2 tbsp shoyu, tamari or soy sauce
3 1/2 cups lightly packed cups kale (3.5 oz/100 grams)
1 1/2 cups unsweetened large-flake coconut (3 oz/85 grams)
1 cup uncooked farro, brown rice, quinoa or other whole grain
Directions:
1. Preheat oven to 350 degrees.
2. Cook your grain according to package directions.
3. Trim the stems of your kale, remove the large ribs, and chop. Mix the kale and coconut together in a large bowl.
4. In a small bowl, whisk together the olive oil, sesame oil, and soy sauce. Pour about 2/3 of it into the bowl with the kale and coconut, and toss well.
5. Spread kale and coconut mixture on a large baking sheet, and bake for 11-18 minutes, stirring once or twice. Bake until the coconut is golden brown. and the kale is crispy.
6. Remove from oven, taste, and if desired add more of the leftover dressing.
7. Serve on top of your grain.
Enjoy!!
Source: Super Natural Every Day
Labels:
Coconut,
Gluten-Free,
Kale,
Main Dish,
Vegan,
Vegetarian
Sunday, July 22, 2012
Quinoa-Stuffed Pattypan Squash
What's up guys?!?! It's good to be back! I've been on a super-long hiatus, but hopefully I'll be posting here much more frequently and regularly from now on. I miss my little blog! I've been lacking motivation to blog for a looooooong time....I've been cooking more than ever, but when it comes time to take photos, write a post, edit it and publish, I've been majorly slacking..... But I really want that to change for myself and my readers!! So for my mid-summer resolution, I've decided to try and get back to this whole blogging thingamajig!
In the past 6 months or so I've really been trying to eat healthier, and be more conscious about what enters my body- it is a temple and all that ya know! So expect to see more healthy recipes on here. Now, that certainly doesn't mean I don't indulge in the occasional treat, for example the totally delicious and non-waistline friendly peanut butter pie I made and ate last night for my boyfriend's (30th!!!!) birthday, so expect to still see treats and whatnot as well.
For my return, I am posting this delicious (and healthy) stuffed squash recipe that I made tonight for dinner. I found these cute Pattypan squash at Whole Foods this weekend and just couldn't resist! They were a really good price ($2.99/lb) especially for being local and organic! Hopefully I'll be able to find more soon since they were so yummy, and I'd love to make this recipe again and try out some others! I've never cooked Pattypan squash before and so I searched around for a yummy sounding recipe, and stumbled upon one on one of the blogs I regularly read- Oh She Glows- which is a wonderful vegan blog. I, as you know, am not vegan, but I do try to eat mostly meatless throughout the day, saving meat for dinner, and also sometimes omitting the meat from dinner as well- if my boyfriend is not home- he's definitely the more carnivorous one in out relationship :)
I did not have all the ingredients needed for that particular recipe, but I used it as inspiration and adapted it to the ingredients in my own pantry/refrigerator. I'd love to make the original recipe at some point as well, so check that one out too! It looks awesome!
Quinoa-Stuffed Pattypan Squash
Serves 1
Ingredients:
3 pattypan squash
1/4 cup quinoa
1/2 cup low-sodium chicken broth (or vegetable broth if you want this to be completely vegetarian)
1-2 small garlic cloves, smashed
1 small zucchini
1 green onion
1 Tbsp tomato paste
1/2 Tbsp unsalted butter
Salt and freshly ground black pepper, to taste
Directions:
1. Preheat your oven to 375 degrees.
2. Bring quinoa, broth, and smashed garlic cloves to a boil over high heat in a small saucepan. Once it starts to boil, reduce heat to low, and cover. Cook for 20 minutes.
3. While quinoa is cooking, fill a medium saucepan with water, 1-2 inches high, and bring to a boil. Add pattypan squash and cook 7-8 minutes. When done, drain and let cool.
4. Meanwhile, finely chop zucchini and green onion by hand or in a food processor.
5. When the quinoa is cooked, remove the garlic cloves, and mix in the tomato paste, butter, and zucchini mixture.
6. Once cool, cut off the stems of the squash and carefully spoon out the insides- don't throw those away though! Add the spooned out squash to the quinoa mixture. (Don"worry if you pierce the bottom of the squash, I did and mine turned out great anyway!) Season the quinoa-zucchini-pattypan mixture to taste with salt and pepper.
7. Place the hollowed out squash in a baking pan- I used my Pyrex loaf pan and it was the perfect size for my 3 squash. Stuff your squash with the quinoa mixture until it overflows, and spoon the rest around the squash (you'll most likely have more filling than you can stuff the squash with).
8. Bake the stuffed squash for 20-25 minutes.
Enjoy!
Source: Inspired by Oh She Glows
In the past 6 months or so I've really been trying to eat healthier, and be more conscious about what enters my body- it is a temple and all that ya know! So expect to see more healthy recipes on here. Now, that certainly doesn't mean I don't indulge in the occasional treat, for example the totally delicious and non-waistline friendly peanut butter pie I made and ate last night for my boyfriend's (30th!!!!) birthday, so expect to still see treats and whatnot as well.
For my return, I am posting this delicious (and healthy) stuffed squash recipe that I made tonight for dinner. I found these cute Pattypan squash at Whole Foods this weekend and just couldn't resist! They were a really good price ($2.99/lb) especially for being local and organic! Hopefully I'll be able to find more soon since they were so yummy, and I'd love to make this recipe again and try out some others! I've never cooked Pattypan squash before and so I searched around for a yummy sounding recipe, and stumbled upon one on one of the blogs I regularly read- Oh She Glows- which is a wonderful vegan blog. I, as you know, am not vegan, but I do try to eat mostly meatless throughout the day, saving meat for dinner, and also sometimes omitting the meat from dinner as well- if my boyfriend is not home- he's definitely the more carnivorous one in out relationship :)
I did not have all the ingredients needed for that particular recipe, but I used it as inspiration and adapted it to the ingredients in my own pantry/refrigerator. I'd love to make the original recipe at some point as well, so check that one out too! It looks awesome!
Quinoa-Stuffed Pattypan Squash
Serves 1
Ingredients:
3 pattypan squash
1/4 cup quinoa
1/2 cup low-sodium chicken broth (or vegetable broth if you want this to be completely vegetarian)
1-2 small garlic cloves, smashed
1 small zucchini
1 green onion
1 Tbsp tomato paste
1/2 Tbsp unsalted butter
Salt and freshly ground black pepper, to taste
Directions:
1. Preheat your oven to 375 degrees.
2. Bring quinoa, broth, and smashed garlic cloves to a boil over high heat in a small saucepan. Once it starts to boil, reduce heat to low, and cover. Cook for 20 minutes.
3. While quinoa is cooking, fill a medium saucepan with water, 1-2 inches high, and bring to a boil. Add pattypan squash and cook 7-8 minutes. When done, drain and let cool.
4. Meanwhile, finely chop zucchini and green onion by hand or in a food processor.
5. When the quinoa is cooked, remove the garlic cloves, and mix in the tomato paste, butter, and zucchini mixture.
6. Once cool, cut off the stems of the squash and carefully spoon out the insides- don't throw those away though! Add the spooned out squash to the quinoa mixture. (Don"worry if you pierce the bottom of the squash, I did and mine turned out great anyway!) Season the quinoa-zucchini-pattypan mixture to taste with salt and pepper.
7. Place the hollowed out squash in a baking pan- I used my Pyrex loaf pan and it was the perfect size for my 3 squash. Stuff your squash with the quinoa mixture until it overflows, and spoon the rest around the squash (you'll most likely have more filling than you can stuff the squash with).
8. Bake the stuffed squash for 20-25 minutes.
Enjoy!
Source: Inspired by Oh She Glows
Sunday, October 2, 2011
Potato and Leek Soup
For about a week now I've been sick with a energy-sapping, tastebud destroying, cold. One of the worst things to someone who loves food is not being able to taste fully, and so I've desperately been trying to make myself well. I'm thinking some old-fashioned chicken soup might be just the thing I need to make so look for that post soon (I have a quick chicken and wild rice soup that is delicious). But before I lost my sense of taste completely I decided that since I was in need of a comforting, soul-warming soup, I'd try Julia Child's recipe for Potage Parmentier. Since fall began I've been in the mood to delve deeper into Mastering the Art of French Cooking, and so lately it's been my nightly reading. The first chapter is on soups, and the very first soup in the book is this potato and leek soup, and it sounded like it couldn't be easier. Simmer some potatoes and leeks in water, then blend and add a little butter or cream for richness? That's pretty much the easiest recipe ever, and easy sounded especially good to me this week in the midst of my cold.
Potato and Leek Soup
Potage Parmentier
from Mastering the Art of French Cooking
Makes about 2 quarts (6 to 8 servings)
Ingredients:
1 lb (3 to 4 cups) peeled potatoes, sliced or diced (3 to 4 cups)
1 lb leeks (3 cups), thinly sliced including the tender green; or 3 cups yellow onions, thinly sliced
2 quarts water
1 tbsp salt
4 to 6 tbsp whipping cream; or 2 to 3 tbsp softened butter
2 to 3 tbsp parsley or chives, minced
Directions:
1. Place a 3 to 4 quart saucepan, or dutch oven over medium heat and add potatoes, leeks, water, and salt. Simmer together for 40 to 50 minutes until the vegetables are tender.
2. Mash the vegetables together with a fork, transfer to a food processor, blend (in small batches) in a blender, pass through a food mill, or blend together with a stick blender until the soup is smooth.
3. Season to taste with salt (and pepper if desired)
4. Remove the soup from the heat, and add the cream or butter just before serving. Pour into a soup tureen, or individual bowls, and garnish with the fresh herbs.
Notes:
- I used my stick blender to blend the soup and it worked perfectly to give it a beautiful, smooth consistency. Julia Child says that she is partial to a food mill for this soup, but since I don't have a food mill, I couldn't try it her way.
- I was right in my assessment that this would be an easy recipe- it came together extremely quickly (other than the longish simmering time), and would be a great starter for an elegant meal, when you want it to look fancy, but don't want to cook something extremely involved.
Monday, September 26, 2011
Scalloped Potatoes
The arrival of fall always sparks my cravings for comfort food, and one of the foods I think of when I think "comfort" are potatoes- mashed, twice-baked, roasted, scalloped... you name it. Scalloped potatoes are something I have never made myself- I've only made the boxed version... and while I do love them from a box (I guess I'd count that as one of my guilty pleasures), I decided it was about time to try making a homemade version. I decided to go with Julia Child's classic recipe for Gratin Dauphinois. Honestly I was a bit skeptical of the recipe because I wasn't sure whether all the potatoes would cook through and be tender, and there was such little sauce that it differed greatly from the boxed mix that I am so fond of, but I should have known better than to doubt the master. This dish was wonderful- the potatoes were tender, but not mushy, the sauce was minimal, but the flavor of the cheese was infused throughout. Definitely recommended!
Scalloped Potatoes
Gratin Dauphinois
from Mastering the Art of French Cooking
Ingredients:
2 lbs. boiling potatoes ( I used Yukon golds)
1/2 clove unpeeled garlic
4 tbsp butter, divided
1 tsp salt
1/8 tsp pepper
1 cup (4 ounces) Swiss cheese, grated
1 cup boiling milk
Directions:
1. Preheat the oven to 425 degrees.
2. Peel the potatoes, slice them 1/8-inch thick, and place them in a large bowl of cold water until ready to use.
3. Rub the garlic on an oven-proof baking dish (10-inches in diameter, and 2-inches deep), and then butter the inside of the dish with 1 tbsp of the butter.
4. Drain the potatoes, and dry them thoroughly in a towel.
5. Cut the remaining 3 tbsp of butter into small pieces.
6. Spread half of the potatoes in the baking dish. Top evenly with half the salt, pepper, cheese, and butter. Spread the remaining half of the potatoes on top, and top evenly with the remaining salt, pepper, cheese, and butter.
7. Pour the boiling milk over the potatoes.
8. Place the potatoes in the oven, and bake for 20 to 30 minutes until the potatoes are tender and the top is browned.
Notes:
- I made this in a 10-inch pie dish, about 2 inches deep as the recipe specifies, but because my boyfriend and I thought the best part of the dish was the browned and cheesy top, I may make this in a larger baking dish next time so that there is more surface area.
- I was going to buy regular Swiss cheese for the potatoes when a smoked baby Swiss caught my eye instead, and I just had to buy it. It was fabulous! Pretty much any good melting cheese would work in this recipe I assume- Swiss, cheddar, Gouda, smoked Gouda! .... whatever your heart desires, and whatever cheese calls out to you from the cheese case!
- Julia Child calls for the baking dish to be placed over heat on the stove after you've poured the boiling milk over the potatoes, and heat until simmering, but I skipped this step, and don't feel it's necessary. My potatoes cooked perfectly just with cooking them in the oven.
Monday, September 12, 2011
Tomato and Almond Gazpacho
One of my favorite dishes that I cooked (well, I use the term "cook" loosely here!) on vacation was this tomato and almond gazpacho! It is so summery and refreshing, and has such great texture from the addition of the almonds. They also make this soup feel so much more substantial and satisfying than gazpachos I've had in the past (although I like those too). Even my brother who is not the biggest fan of soup enjoyed this recipe (well, at least that's what he told me and I don't think he was just being polite... hopefully). This is the first gazpacho I've ever made, and it definitely makes me want to experiment more! Since summer has unofficially ended though, the experimentation is probably going to have to wait until Memorial Day. In fact, I had a beef and mushroom stew simmering on the stove just yesterday... perfect for fall!
Speaking of fall, it rivals spring for my favorite season, and includes one of my favorite holidays, Halloween(!!), so hopefully I'll be getting back to being a good blogger, and making some delicious seasonal recipes, I do love the flavors of fall dearly- I'm ready for pumpkin, apples, squash, and lots of soups and stews!
Tomato and Almond Gazpacho
from Martha Stewart Living, August 2011
Serves 4
Ingredients:
2 pounds tomatoes (about 4), cored and coarsely chopped
1/2 English cucumber, peeled, seeded and coarsely chopped
1/2 onion, coarsely chopped
1 small garlic clove
2 ounces almonds (scant 1/2 cup), toasted (blanching the almonds prior is optional)
1/4 cup water
2 tbsp cider vinegar
2 tbsp extra-virgin olive oil, plus more for drizzling
Coarse salt and freshly ground pepper
Directions:
1. Place the tomatoes, cucumber, onion, garlic, almonds, water, vinegar, oil, and 2 1/4 tsp of salt in a blender, and puree until smooth. Then season with pepper.
2. Refrigerate the gazpacho for at least 45 minutes.
3. To serve, season with salt and pepper to taste right before serving, ladle into bowl, and drizzle with olive oil.
Notes:
- I did not take the time to blanch the almonds when making this gazpacho, but it was delicious regardless, and the texture was great, so I'd say that's entirely optional.
- As I was working with limited cooking implements and ingredients as one is apt to do on vacation, I substituted cider vinegar and non-extra virgin olive oil in my gazpacho. The original calls for extra-virgin olive oil, and sherry vinegar. Either way you go it'll still be wonderful, so if you don't have sherry vinegar in your pantry, feel free to make a substitution.
Labels:
First Course,
Gluten-Free,
Healthy,
Soup,
Tomatoes,
Vegan,
Vegetarian
Wednesday, August 10, 2011
Grilled Pizza
Hey guys, long time no see!!! I'm so sorry for the lack of posting recently. It's not that I haven't been cooking, I definitely have, but I guess I've been lacking the drive to sit at the computer. I'm going to blame the heat the last few weeks... easy excuse, right? Anyway, I thought that tonight I'd post one of the delicious recipes I've made lately from my new favorite cookbook- Gourmet Today. I've found so many great recipes so far, and I'm dying to make many many more. There are seriously hundreds of recipes that jumped out at me when I read through the cookbook. I am going on vacation tomorrow, down to Virginia, but when I get back I am hoping that my relaxing vacation reinspires me to jump back into blogging.
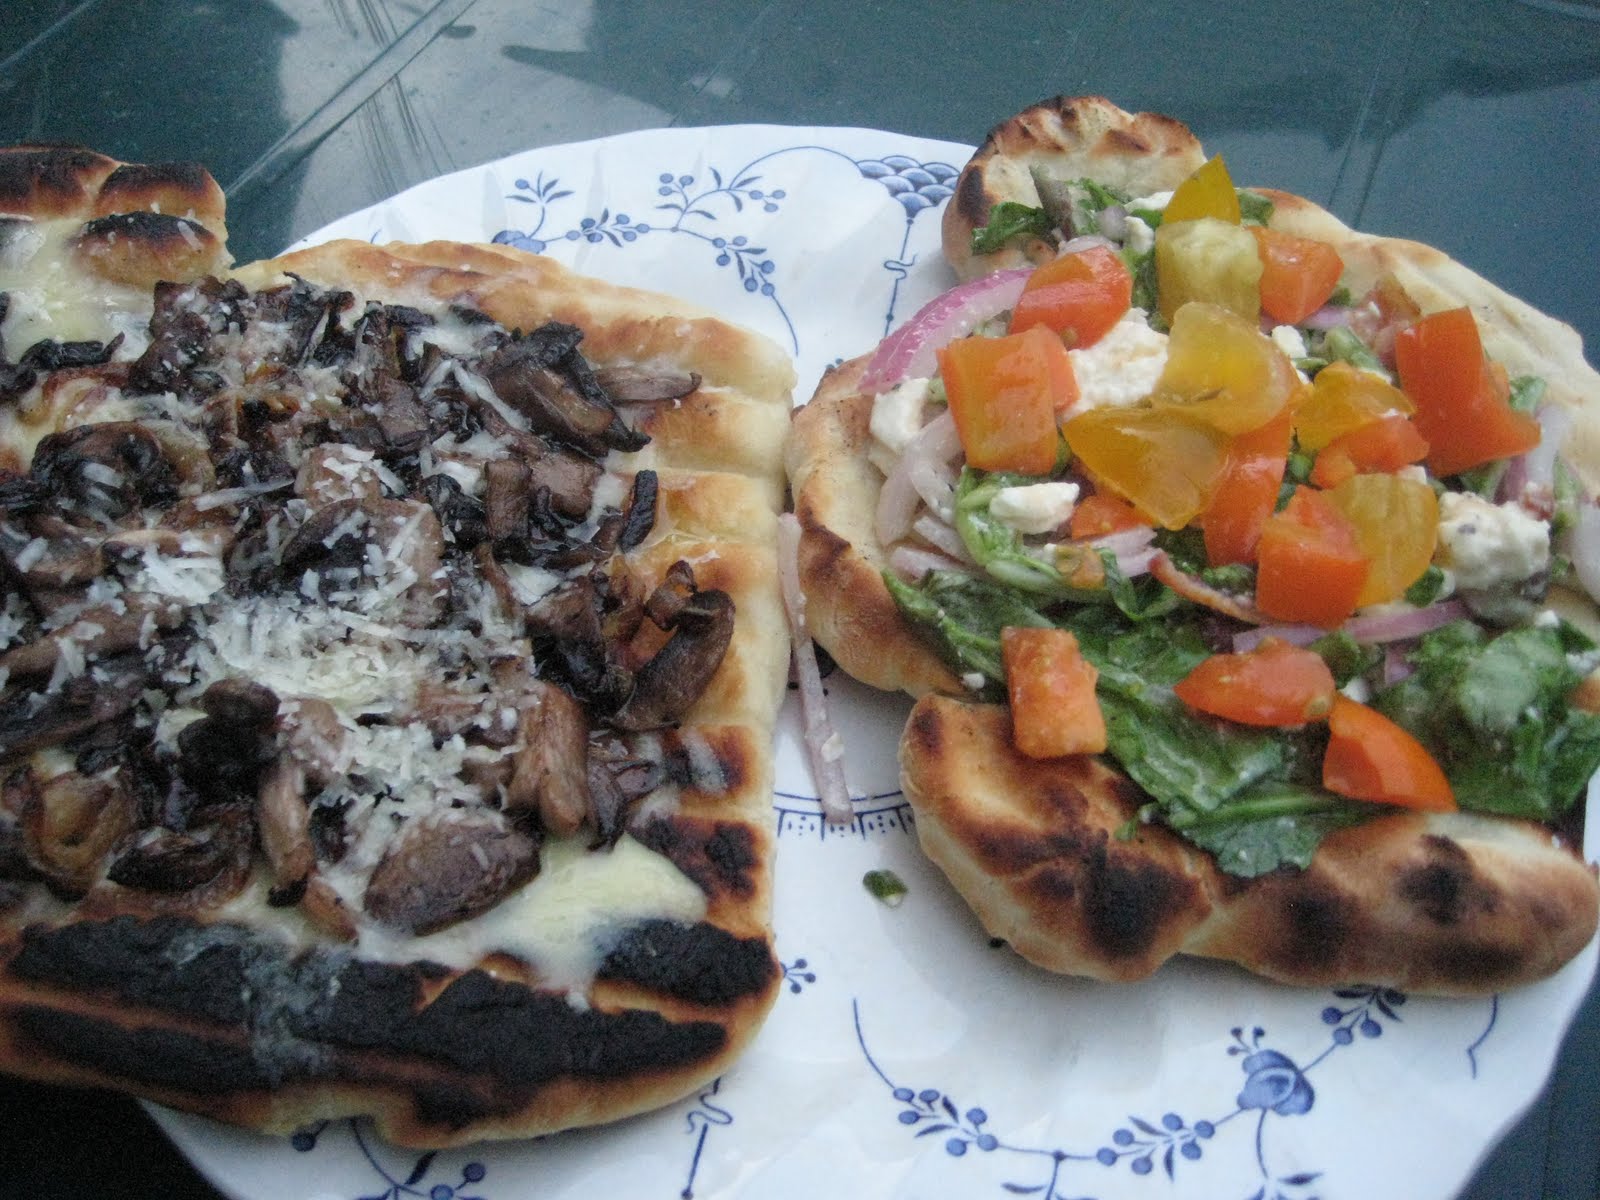
As you know from the title, this is a recipe for grilled pizza. Before I made these, I'd never made any kind of pizza, but after seeing how awesome these came out I've been dreaming up many more pizza combos I'd love to try out. I used the basic dough recipe from Gourmet Today, but obviously cooked it on the grill instead of the oven, and while I'd describe it more as "flatbready" I suppose, it was super-awesome. I made 4 mini-pizza with 2 types of toppings- the first, a caramelized onion and mushroom pizza was amazing, and the second, a BLT pizza was just as good, but more of a summery pizza. The caramelized onion and mushroom I'd consider a year-round pizza. Both were incredible.
Basic Pizza Dough
from Gourmet Today
Ingredients:
1 (1/4-ounce) package (2 1/4 tsp) active dry yeast
About 1 3/4 cups unbleached all-purpose flour, plus more for kneading and dredging
3/4 cup warm water (105-115 degrees)
1 1/2 tsp salt
1 1/2 tsp olive oil
Directions:
1. In a measuring cup, stir together the yeast, 1 tbsp flour, and 1/4 cup warm water. Let sit about 5 minutes, until the surface appears creamy- if this doesn't happen, discard and try again with new yeast.)
2. In a large bowl, mix together 1 1/4 cup flour and salt. Add the yeast mixture, olive oil, and remaining 1/2 cup warm water. Stir until smooth. Stir in enough of the remaining 1/2 cup flour so that the dough comes away from the side of the bowl.
3. Knead the dough on a lightly floured surface, with lightly floured hands, for about 8 minutes, until the dough is smooth, soft and elastic. If the surface, or your hands become sticky, add more flour. Form the kneaded dough into a ball, place in a lightly floured large bowl, dust the dough with flour, and cover loosely with plastic wrap. Leave to rise in a warm, draft free place for 1 1/4 hours, until the dough doubles its size.
4. Once the dough is risen, carefully dredge in flour to coat, and transfer to a lightly floured work surface. **Do not punch the dough down**
5. At this point, you can either make one large 14-inch pizza, or smaller individual ones- I made 4 mini-pizzas. Either way, carefully hold the dough with the bottom surface touching your work surface, and move the dough around with both hands as if holding a steering wheel, letting the weight of the dough stretch into a round. Once to your desired size, place the round on a lightly floured surface, and work the edges with your fingers to get it to the desired size.
6. Once formed, your dough is ready to top, bake or grill, depending on which recipe you are using for toppings.
** To grill, heat grill to medium-high heat. Oil the grates well! Brush the pizzas with olive oil on each side. Place on grill over indirect heat (not over the coals- they'll burn fast!). Cook about 3 minutes, covered, until the dough begins to have large bubbles on the surface, and the underside is cooked. If you are going to be putting on a topping that will warm up/melt cheese, remove the dough round to a clean surface with the cooked side facing up, and place your cheese/toppings on. Return to grill and cook, covered for 4-6 minutes, until the dough is cooked, and the toppings/cheese are ready. If you are putting a topping on that does not need to be cooked (like the BLT pizza), just flip the dough round over, and cook, covered for about 4 minutes.** (Grilled pizza instructions adapted from Annie's Eats)
Notes:
- You can leave the dough to rise up to a day, covered and refridgerated. Bring it to room temperature before you shape it.
- After rising, the dough can be frozen up to 1 month. Thaw and bring to room temperature before shaping.
- My pizzas were definitely not round, but they were still tasty- this is a recipe where only practice will make perfect!
- Watch your dough closely, as it can burn quickly. My pizzas had a little char to them, but the smokiness just added some more delicious flavor. Too much though, and it would probably overwhelm.
Mushroom and Caramelized Onion Pizza
from Gourmet Today
Makes one 14-inch pizza, or 4 individual pizzas
Ingredients:
5 Tbsp extra-virgin olive oil
1 pound yellow onions, halved lengthwise and thinly sliced lengthwise
Salt and freshly ground black pepper
1 pound white mushrooms, or mixed wild mushrooms (such as shitake, cremini and oyster), trimmed if necessary and sliced
1 tsp red wine vinegar
2 3/4 cups coarsely grated Swiss Emmental cheese, or Gruyere (about 8 ounces)
1/2 cup finely grated Parmigiano-Reggiano
1 tbsp fresh thyme leaves
Basic Pizza Dough (recipe above)
Directions:
1. In a 12-inch heavy skillet heat 3 tbsp olive oil over medium heat until hot but not smoking. Add the onions, 1/4 tsp salt, and 1/8 tsp pepper. Cover directly with a round of parchment paper. Cook until the onions are softened and golden brown, stirring occasionally, about 18-20 minutes. Transfer the onions to a bowl.
2. To the same skillet, add the remaining 2 tbsp olive oil, and heat until hot but not smoking. Add the mushrooms, 1/2 tsp salt, 1/4 tsp pepper, and red wine vinegar, and cook about 8-10 minutes, stirring occasionally, until the mushrooms are browned and any liquid is evaporated. Remove the mushrooms from the heat.
3. Cook one side of your pizza dough on a grill preheated over medium high heat (as detailed above). When done, remove to a clean surface. Top the cooked side of the dough with the Emmental or gruyere cheese. Scatter onions and mushrooms on top, and sprinkle with Parmesan.
4. Place back on the grill over indirect heat, and cook, covered, 4-6 minutes, until the dough is cooked, and the cheese is melted. Sprinkle with fresh thyme.
Notes:
- The original recipe calls for Swiss Emmental cheese, but I had some gruyere left over so I used that instead, and it turned out wonderful. Any type of Swiss cheese would probably do just fine, depending on how strong or mild you like it.
- I omitted the thyme because I thought I had some, but when I went to make the pizzas realized I didn't, but I didn't miss it at all. I'm sure it would've been good, but I don't think it's necessary.
- I halved this recipe to make 2 individual pizzas.
BLT Pizza
from Annie's Eats, dressing from Annie's Eats and Alton Brown via foodnetwork.com
Makes 4 individual pizzas
Ingredients:
Basic pizza dough (recipe above)
For salad topping:
4 cups green leaf lettuce, or mixed greens
1 tomato, seeded and diced
1/2 small red onion, thinly sliced
4 slices bacon, cooked and crumbled (drippings from cooking reserved for dressing)
1/2 cup crumbled feta cheese
For bacon vinaigrette:
1 1/2 tbsp extra virgin olive oil
2 tbsp cider vinegar
1 tbsp bacon drippings
1 1/2 tsp brown sugar (preferably dark)
1 1/2 tsp dijon mustard
1/4 tsp salt
1/2 tsp freshly ground pepper
Directions:
1. Combine the ingredients for the bacon vinaigrette in a small bowl, or salad dressing bottle, and whisk (or use handy emulsification device) to combine.
2. Combine the lettuce, tomato and onion in a large bowl, and toss to combine. Add 1/4 cup of dressing to the salad, and toss gently to coat. Add the bacon and feta to the salad, and toss gently to combine.
3. Make your grilled pizzas (recipe above), cooking both sides. Top your cooked pizza dough with some of the salad mixture, and serve!
Notes:
- This salad is great on it's own, so if you don't want to make pizza, or if there is leftover, eat it plain!
- You can also use the vinaigrette to dress any salad.... In Alton Brown's original recipe he uses basically double the amount, and tops 2 quartered heads of radicchio. For quantities for his recipe go here!
- This is one of the most refreshing summery pizzas I've ever had, and although topping a pizza with salad may seem a bit unusual, I can't wait to make some other summery salad pizzas.
Friday, July 1, 2011
Roasted Fingerling Potato Salad
Potato salad is one of those quintessentially summer foods- one that time and time again makes an appearance at cookouts, summer parties, and as a side dish to summer grilling staples- steak, barbecued chicken, ribs, etc. Now while I love the standard potato salad, it can be a bit heavy, and also doesn't take well to sitting out in the hot sun. So here's a different take on potato salad- one that doesn't include mayonnaise and has roasted, rather than boiled potatoes. It's basically just roasted potatoes, with an herb salad on top, and it is different and delicious, and very versatile as you can pretty much use whatever combination of herbs you like..... and it uses fingerling potatoes which are just so darned cute! Yes, I admit that I am a sucker for cute foods.... and cute packaging.... and fingerling potatoes may be one of the cutest foods out there! Ya know what's also cute? My animals!
Anywho..... here's the recipe :)
Roasted Fingerling Potato Salad
from Bon Appetit, June 2010
Serves 4-6
Ingredients:
2 tbsp plus 2 tsp extra-virgin olive oil, plus additional for brushing
1 1/2 pounds 1-inch-diameter fingerling potatoes, halved lengthwise
2 green onions, thinly sliced
1/4 cup fresh Italian parsley leaves
2 tbsp fresh tarragon leaves
1 1/2 tbsp Banyuls vinegar or red wine vinegar
1 tbsp coarse-grained Dijon mustard
2 hard-boiled eggs, peeled, chopped*
Directions:
1. Heat oven to 400 degrees, with rack in bottom-third position.
2. Brush a rimmed baking sheet with olive oil.
3. Place the halved potatoes in a bowl, with 2 tbsp of olive oil. Sprinkle with salt and pepper, and toss together so that potatoes are coated.
4. Arrange the potatoes cut side down on the baking sheet, and roast for about 23 minutes, until they are browned on the cut side. Turn the potatoes over, and roast until done, about 12 minutes. Potatoes should be crisp, golden, and tender. Season the potatoes to taste with salt and pepper.
5. In a small bowl, combine green onions, parsley, tarragon, vinegar, mustard, and 2 tsp of olive oil. Season with salt and pepper.
6. Transfer the roasted potatoes to a serving dish. Top with the herb salad, and the eggs.
* For hard-boiled eggs, place the eggs in a saucepan and cover with about an inch of water. Bring the water to a boil, and when it begins to boil, remove the pan from the heat, cover, and let sit for 11 minutes. Transfer the eggs to a bowl of ice water. Drain and peel!
Notes:
- I love the original combination of herbs in this dish, but you can really use any combination you like- chives and basil come to mind as some alternates. If you've never had tarragon, it does have a licoricey flavor that some may not like- although, my boyfriend does not like licorice, and he liked the tarragon in this dish. (I never pointed out the flavor either, so maybe he likes licorice and doesn't know it!)
- If you don't like eggs feel free to leave them out.
- While the fingerling potatoes were excellent in this, any roasted potato would work, just cut them into 1/2 inch wedges and you should be good to go.
Labels:
Gluten-Free,
Potatoes,
Salad,
Side Dish,
Vegetarian
Thursday, June 9, 2011
Broccoli Rabe and Walnut Pesto with Pasta
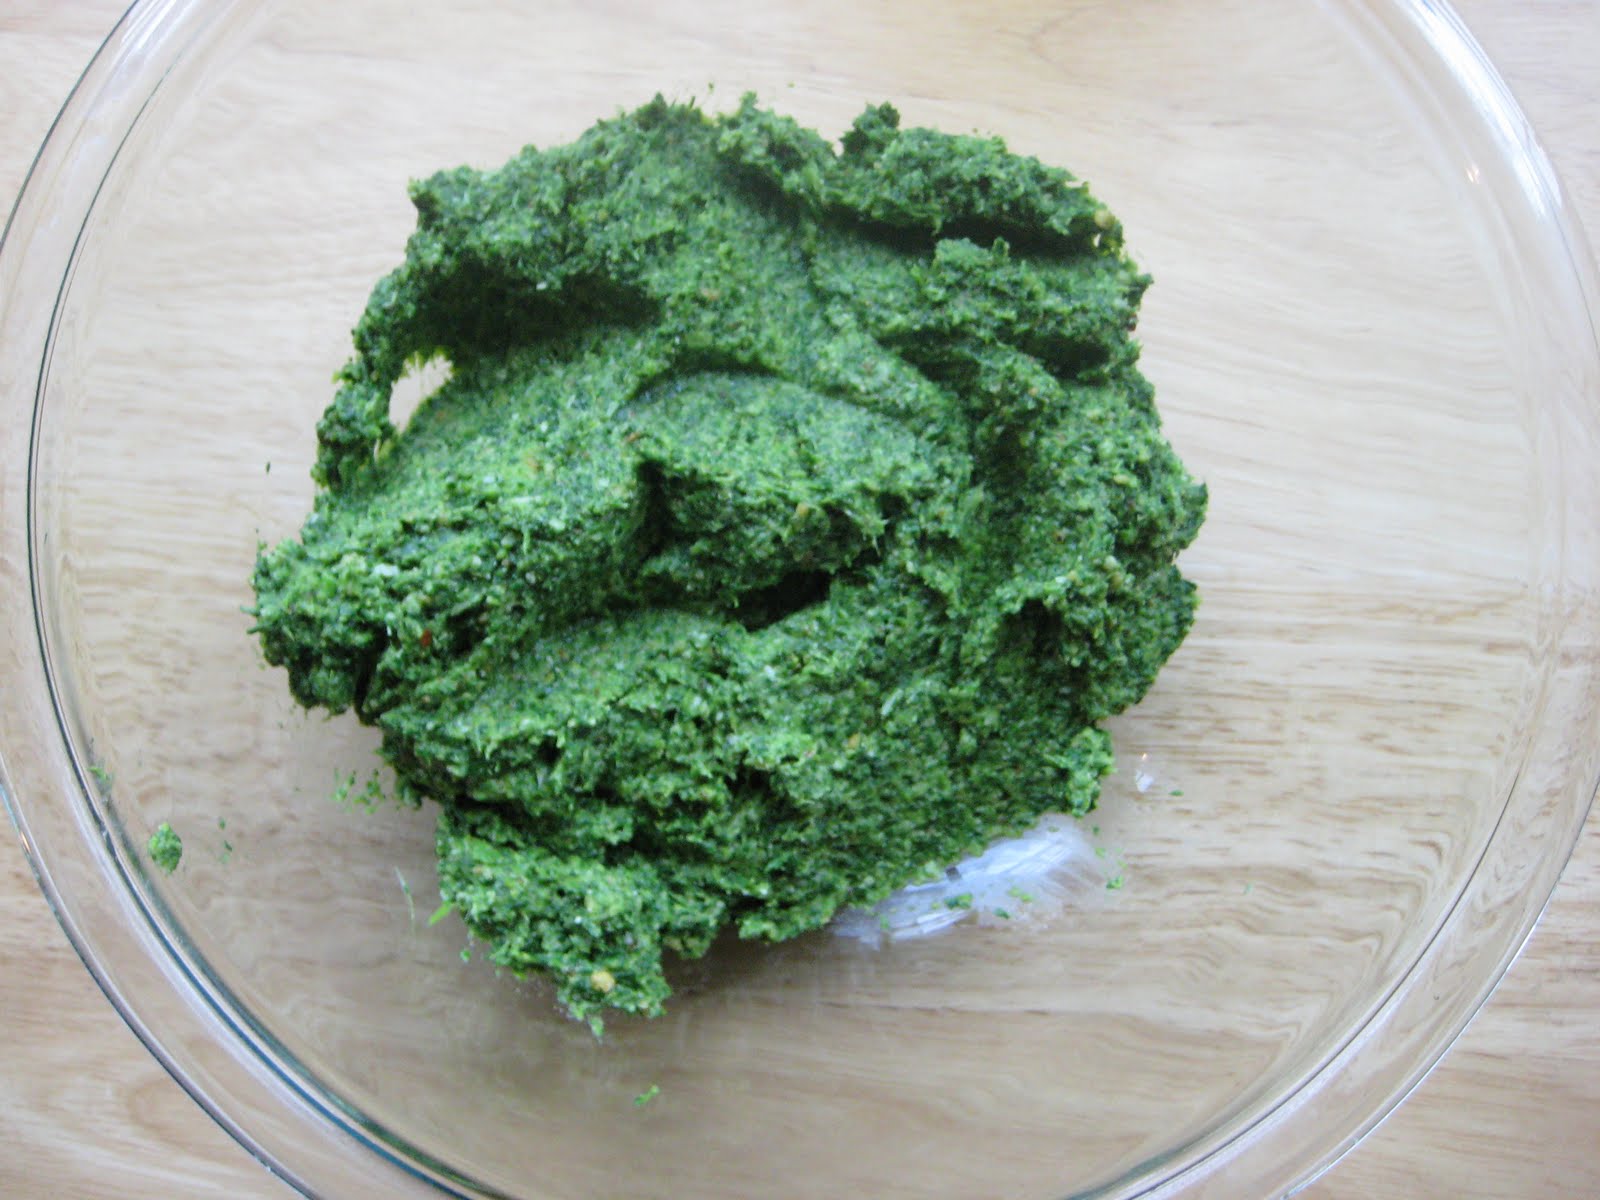
Earlier in the week my best friend invited me over and she made a delicious pasta dish with broccoli rabe and sausage for dinner. Now because someone (with the initials GDL) didn't specify as to how big the broccoli rabe bunches should be, we were left wondering if the massive amount of broccoli rabe that 2 bunches gave us was actually the right amount, or maybe GDL's bunches are smaller. We ended up deciding that one was enough, and so my friend had one bunch leftover, which she sent me home with (Thank's Rebecca!!). Aren't presents of food the best?!?! So of course I needed to do something with this broccoli rabe, and so I decided the best thing to do in this situation was to consult the ever-trusty interwebs. After doing a bit of searching, I came upon some recipes for pesto made with broccoli rabe. I LOVE pesto, particularly the classic basil pesto (which I'll be making soon with basil from my very own garden!), but I'm open to all types. Even better- I had all the ingredients! I've had some walnuts in my freezer for a while, some was used to make walnut shortbread (awesome!), but the rest of the walnuts haven't found homes yet. This pesto seemed the perfect home. Also- Parmesan (or pecorino cheese), olive oil, and garlic are all pantry staples for me.... and of course pasta. This pesto turned out great! It's a little bit bitter due to the rabe, which I quite enjoyed. Basil pesto is still my favorite, but this is a great option if you are basiled out, or want something a little different.
Broccoli Rabe and Walnut Pesto with Pasta
Serves 4
Ingredients:
1/3 cup, plus 2 tbsp walnuts
1/2 pound broccoli rabe, trimmed
1 clove garlic
1/3 cup, plus 1 tbsp olive oil
Pinch of crushed red pepper
1/3 cup grated pecorino cheese, plus more for serving
Kosher salt and freshly ground pepper
3/4 pound pasta (I used shells, the original recipe used linguine- use whatever you want!!)
Directions:
1. Preheat oven to 350 degrees. Place walnuts in a single layer on a baking sheet or pie plate and bake about 8 minutes until fragrant and slightly toasted. Chop 2 tbsp of the walnuts.
2. Bring two pots of salted water to a boil (one for the broccoli rabe, one for the pasta). Add the pasta to one of the pots, and cook until al dente, according to package directions.
3. While the pasta is cooking, add the broccoli rabe to one of the pots and cook about 3 minutes until tender. Drain the broccoli rabe, and rinse with cold water to cool. Transfer to a cutting board, and coarsely chop.
4. In your food processor, add the garlic clove, and pulse a few times until minced. Add 1/3 cup of walnuts, and pulse a few times, until coarsely chopped. Add the broccoli rabe, olive oil, and crushed red pepper. Process until the broccoli rabe is finely chopped. Add the Pecorino cheese, and pulse a few times until just combined. Season with salt and pepper to taste.
5. In a large bowl combine the pesto with the cooked, drained pasta.
6. Serve with a sprinkle of the reserved chopped walnuts, and a sprinkling of grated Pecorino cheese.
Source: foodandwine.com
Notes:
- You can make the pesto a day ahead and refrigerate until use. Just bring the pesto up to room temperature, and then toss with the pasta.
- If you don't have walnuts, you could substitute pine nuts, and I've seen broccoli rabe recipes using pistachios, so that would probably be fabulous as well!
- Don't have broccoli rabe? Regular broccoli or Broccolini would be a good substitute, and would be less bitter, if bitter's not your thing.
- The next time I make this I'm thinking I'll add a bit more garlic, because I like things garlicky- an extra clove would be great.
- Know what else would be good in this? If you want some meatiness- hot Italian sausage- since the flavors go together so excellently.
Wednesday, June 8, 2011
Dough Cookies
So you have some leftover dough from that quiche, right? Here's a little idea of what do do with it, rather than let it go to waste. This is something my mom used to do/still does, and that is to make dough cookies with leftover pie dough. It's simple... all you have to do is take that dough, break it into pieces about 1 to 1 1/2 inches, sprinkle them with cinnamon and sugar, and then bake.... they are muy delicioso, and quite good to snack on as you wait for your quiche to bake.
Dough Cookies
Ingredients:
Leftover Pâte Brisée
Cinnamon
Sugar
Directions:
1. Preheat oven to 375 degrees.
2. Break dough into 1-1 1/2 inch pieces, or you can get fancy and roll out the dough a a bit, and cut into 1-1 1/2 inch circles.
3. Sprinkle the dough with cinnamon and sugar.
4. Place your cookies on a nonstick baking sheet, or a baking sheet lined with foil.
5. Bake about 10 minutes, until the cookies turn golden brown.
Thursday, June 2, 2011
A Memorial Day Meal: Part Deux
Ingredients:
Russet potatoes (1- however many you want, but 1 potato per person is a good idea)
Olive oil
Salt
Garlic Powder
Cayenne Pepper
Directions:
1. Preheat oven to 400 degrees.
2. Cut potatoes into wedges. I'd recommend cutting into 6-8 wedges per potato depending on their size.
3. Toss the wedges in a bowl with a drizzle of olive oil, add a sprinkling of the salt and the other spices, and mix together to coat the potatoes. I didn't measure these, and it's really up to your individual taste- like them spicy? Add more cayenne. Like them garlicky? Add more garlic powder! For a rough guide, I'd say for 4 potatoes you can use about 2 tbsp olive oil, 1/2 tsp salt, 1 tsp garlic powder, 1/4 tsp cayenne pepper.
4. Place potatoes on a baking pan, in a single layer.
5. Cook about 40 minutes, flipping the wedges once.
Tomato, Cucumber and Feta Salad
Ingredients:
2 pints cherry or grape tomatoes (quartered if cherry, halved if grape)
1/4 tsp salt
1/2 tsp sugar
2 cloves garlic, minced or pressed
1/2 tsp dried oregano
1 medium shallot, minced
1 tbsp red wine vinegar
2 tbsp extra virgin olive oil
Ground black pepper
1 small cucumber, peeled, seeded and diced into 1/2 inch chunks
1-2 tbsp fresh parsley, minced
Directions:
1. In a medium bowl, toss together tomatoes, salt and sugar. Let sit for about 30 minutes. Put the tomatoes in a salad spinner, and spin for about 1 minute, to remove seeds and juice. Stir the tomatoes around several times while spinning. If you don't have a salad spinner, place the tomatoes in a bowl, cover securely with plastic wrap, and shake gently to loosen seeds, and release liquid. Strain the liquid from the tomatoes through a fine mesh strainer into a measuring cup.
2. In a small saucepan, combine 1/2 cup of the reserved tomato liquid, garlic, oregano, shallot, and red wine vinegar, and heat on medium. Simmer about 6-8 minutes, until the mixture is reduced. Remove from the heat, pour into a small bowl, and let cook to room temperature. When cooled, whisk in the olive oil, and season to taste with the black pepper.
3. Combine the tomatoes, cucumber, feta, parsley and dressing in a medium bowl. Toss to combine.
Source: Annie's Eats, originally from Cook's Illustrated
Notes:
Ingredients:
2 pints cherry or grape tomatoes (quartered if cherry, halved if grape)
1/4 tsp salt
1/2 tsp sugar
2 cloves garlic, minced or pressed
1/2 tsp dried oregano
1 medium shallot, minced
1 tbsp red wine vinegar
2 tbsp extra virgin olive oil
Ground black pepper
1 small cucumber, peeled, seeded and diced into 1/2 inch chunks
1-2 tbsp fresh parsley, minced
Directions:
1. In a medium bowl, toss together tomatoes, salt and sugar. Let sit for about 30 minutes. Put the tomatoes in a salad spinner, and spin for about 1 minute, to remove seeds and juice. Stir the tomatoes around several times while spinning. If you don't have a salad spinner, place the tomatoes in a bowl, cover securely with plastic wrap, and shake gently to loosen seeds, and release liquid. Strain the liquid from the tomatoes through a fine mesh strainer into a measuring cup.
2. In a small saucepan, combine 1/2 cup of the reserved tomato liquid, garlic, oregano, shallot, and red wine vinegar, and heat on medium. Simmer about 6-8 minutes, until the mixture is reduced. Remove from the heat, pour into a small bowl, and let cook to room temperature. When cooled, whisk in the olive oil, and season to taste with the black pepper.
3. Combine the tomatoes, cucumber, feta, parsley and dressing in a medium bowl. Toss to combine.
Source: Annie's Eats, originally from Cook's Illustrated
Notes:
- I used grape tomatoes in my salad, halving them. It may take a bit of extra work to get the liquid and seeds to release from these, so you may have to toss the tomatoes around a bit more and squeeze them gently to release their seeds and a little more liquid. I actually only got about 1/4 cup of tomato liquid for my dressing, but it still turned out perfectly fine, so don't fret if the same happens to you.
Cheddar Cheese Biscuits
Makes about 8 biscuits
Ingredients:
2 cups unbleached all-purpose flour
2 tsp sugar
2 tsp baking powder
1/2 tsp salt
1/2 cup cheddar cheese, cut into 1/4 inch cubes
1 1/2 cups heavy cream
Directions:
1. Preheat oven to 425 degrees, placing over rack in upper middle position.
2. Line a baking sheet with parchment paper.
3. Combine flour, sugar, baking powder, and salt in a medium bowl. Stir in cheese. Pour 1 1/4 cup of the cream in, and stir together for about 30 seconds, or until it forms into dough.
4. Remove dough to a lightly floured surface. Leave behind any dry pieces of flour in the bowl. If there is extra flour in the bowl, combine with the remaining 1/4 cup of cream, in tbsp increments, until moistened. When moistened, add them to the rest of the dough. Knead for about 30 seconds, by hand, until the dough is smooth.
5. To make biscuit rounds, flatten the dough into a 1-inch thick circle. Use a round biscuit cutter to make bisuits, and place them on baking sheet. Reform circle with leftover dough, and cut more biscuits. This will make about 8 biscuits. You can also make biscuit wedges by placing the dough in an 8 inch cake pan, and flattening evenly. Remove dough and place on lightly floured surface, and cut into 8 wedges.
6. Bake biscuits for 15-18 minutes.
Source: cooklikeachampionblog.com, originally adapted from Baking Illustrated
Notes:
- When making my biscuits, I didn't have any remaining flour in my bowl, so I ended up only using 1 1/4 cups of cream, so you may not need to do this step either.
- I ended up doing wedges because I realized as I was making these that I don't have a biscuit cutter. I'm sure I could have used something else to make a circle shape, but wedges are cool, so that's what I went with. I loved the cake pan trick, because it made a perfect circle with no effort, and so it was super easy to make equal sized wedges.
- You can make these into regular biscuits by just omitting the cheddar cheese, the amount of the other ingredients remains the same- but why wouldn't you want cheese?!?!?!? I also think that adding bacon or scallions would be awesome in these biscuits.
- Using diced cheese, rather than grated cheese, was an awesome idea- it gives you these little pockets of wonderful cheesy goodness. I have to say these are the best biscuits I have ever made- although I still have yet to try duplicating Red Lobster's biscuits...
Saturday, May 28, 2011
Jicama Slaw
I absolutely love trying new foods- especially vegetables/fruits. My ideal weekly trip to the grocery store would involve buying something I've never tried before every single time. I'm putting that into practice starting this week, and so my excursion to the store today lead me straight to jicama. For those of you who who have not consulted the all-knowing wikipedia and have never had a jicama (aka Mexican turnip), this is a sweet and starchy tuberous root, with a crisp texture that is somewhat like a less-sweet apple combined with that of raw green beans. (I guess I can't argue with that, although it reminded me of something else that I can't quite place my finger on yet.) I thought the best way to experience this to start would be in a really simple preparation, and I found one in Great Food Fast, which as you may have noticed is one of my goto cookbooks. In it jicama is paired with just a few ingredients, and is super simple to put together, especially if you have a mandoline or something that can julienne your jicama for you, rather than doing it by hand.
Jicama Slaw
Serves 4
Ingredients:
1 medium jicama (1-1 1/2 pounds), peeled and julienned
1/2 small red onion, or about 1/3 med-large red onion, halved and thinly sliced
1/4 cup cilantro, coarsely chopped
2-3 tbsp fresh lime juice (from 1-2 limes)
Coarse salt and pepper
Directions:
1. Combine jicama, onion, cilantro, lime juice, salt and pepper. Toss and serve, or refrigerate until serving.
2. Yep, it's that easy :)
Source: Everyday Food: Great Food Fast
Notes:
Jicama Slaw
Serves 4
Ingredients:
1 medium jicama (1-1 1/2 pounds), peeled and julienned
1/2 small red onion, or about 1/3 med-large red onion, halved and thinly sliced
1/4 cup cilantro, coarsely chopped
2-3 tbsp fresh lime juice (from 1-2 limes)
Coarse salt and pepper
Directions:
1. Combine jicama, onion, cilantro, lime juice, salt and pepper. Toss and serve, or refrigerate until serving.
2. Yep, it's that easy :)
Source: Everyday Food: Great Food Fast
Notes:
- The recipe says to serve immediately, or cover and refrigerate up to 6 hours. What happens after 6 hours? I don't know, but I'll find out soon because I didn't eat this all, and I plan to have some tomorrow. I'll let you know the results of this daring experiment soon!
- The onion is kind of strong in this, but I love red onion. Just beware though that it can have an adverse effect on your breath. Consider this your warning.
- I enjoyed this simple preparation of jicama, but next time I'm ready for more- traditionally it is paired with chili powder, so I think I'll incorporate that into my next jicama outing.
Subscribe to:
Posts (Atom)